
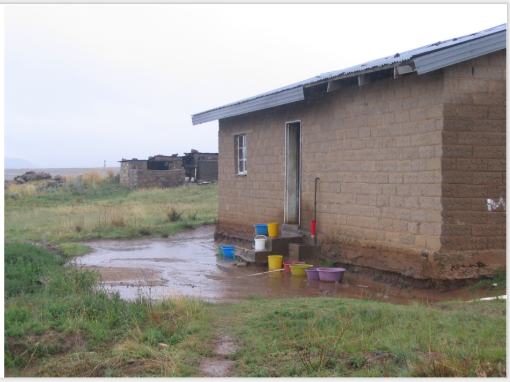
Collecting rain is easy. Above is how we did it in Lesotho. The real challenge is in getting that collected rainwater to your plants.
This week I spoke about collecting and using rainwater in a garden with the members of the Dos Valles Garden Club in Valley Center, San Diego County. They seemed to mostly agree that actually using the rainwater is the real challenge.
I’ve also talked to many other gardeners who have acquired rain barrels (get your rebate! even free!) over the last few years, but make little use of them now because of this water distribution challenge.
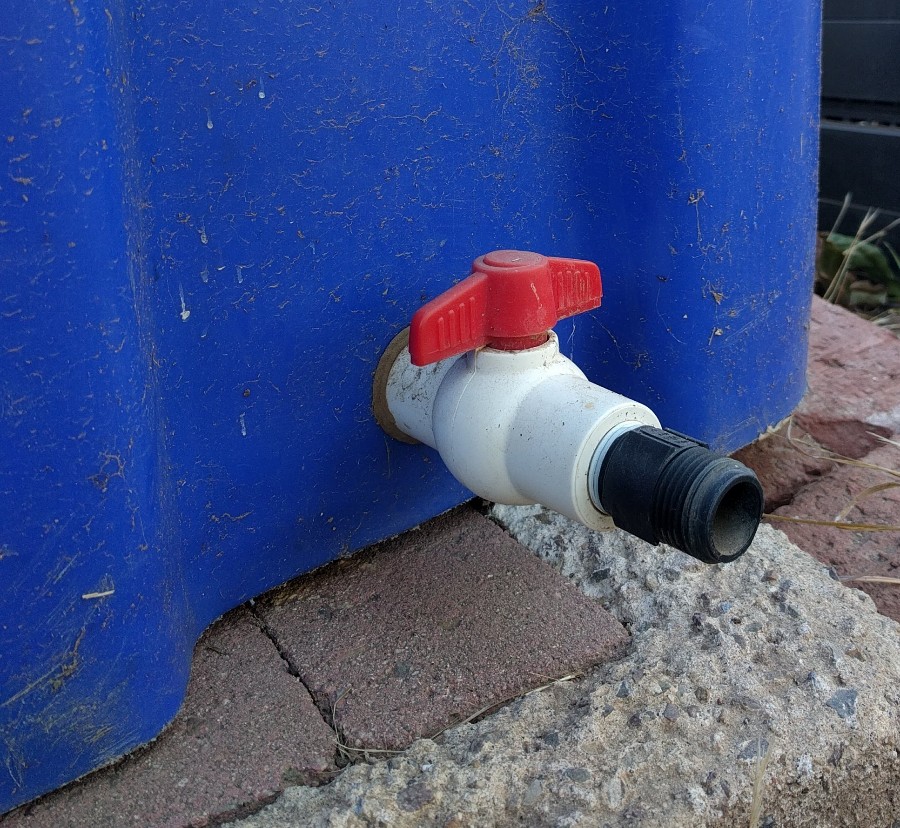
The fundamental problem is low water pressure
The challenge of distributing the rainwater comes from the fact that there is very low water pressure coming from the spigot at the bottom of a rain barrel or even a large rain tank. My biggest tank is 865 gallons, but its spigot still spews water at only 2 or 3 psi. The water coming out of your home faucet, in contrast, is likely around 60 psi.
Without installing a water pump, what can we do to overcome the low pressure problem?
Over the years I’ve trialed many techniques and products, but this post is about one method that I keep coming back to which is, in comparison, cheap, simple, versatile, and not terribly time consuming.
Other techniques and products
Briefly, let me note that I also use or have used the following methods or materials in getting rainwater from my barrels and tanks to my plants: buckets, watering cans, garden hose, micro-sprinklers, spot sprinklers. For me, they continue to be efficient and effective in some situations, but what I describe below is how I get most of my rainwater from my trashcans, barrels, and tanks to my plants.
A tube with holes
At its essence, I use a tube with holes. Here’s an example:
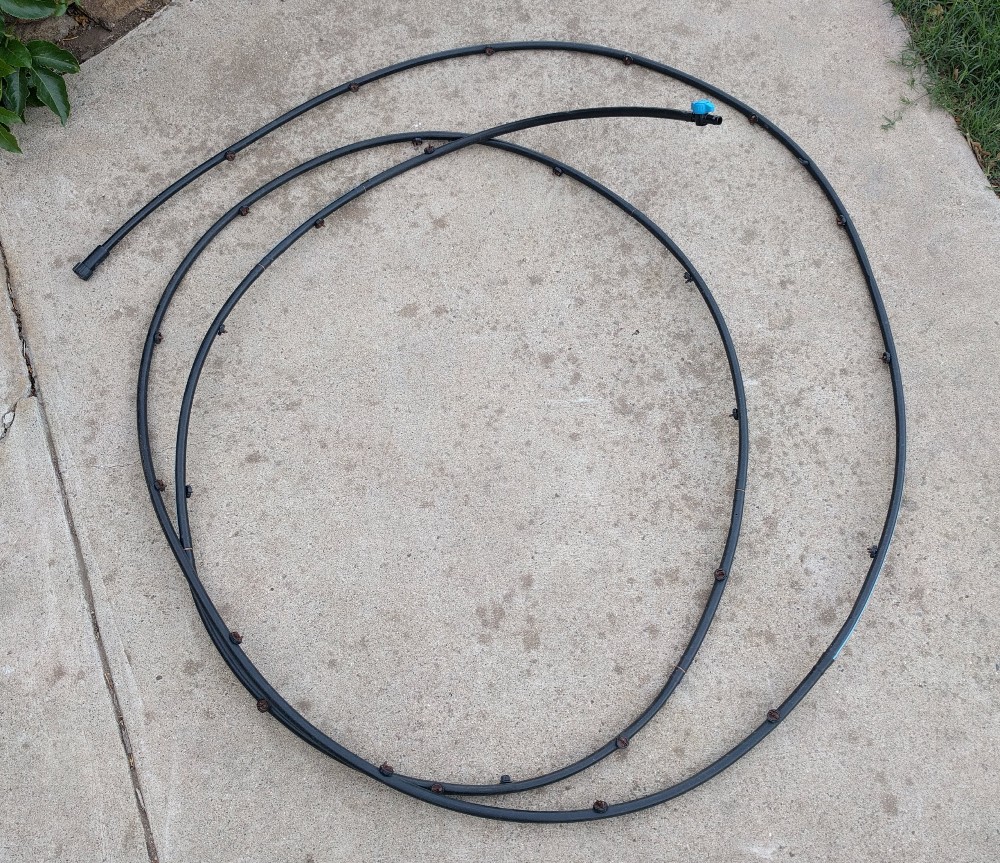
This tube is connected to a rain barrel or rain tank spigot/valve.
A poly tube with nail-punched holes
The simplest version I’ve used is a length of tubing designed for drip irrigation systems (commonly called “poly tubing”) that I punch holes in with a nail. In the photo above, I’ve added “button” drip emitters in addition to punching holes in the tube with a nail (but the drip emitters are totally unnecessary).
You may have a scrap of this poly tubing around if you already use drip irrigation. If not, this tubing is cheap. You can get 100 feet for no more than $12. (Here is the type of tubing I’m talking about on Amazon.)
Then you add an adapter on one side to connect it to the rain-barrel spigot. (See one such adapter here at Home Depot.) And on the other side you close the tube end. (There are many ways to do this, even as simple as folding the tube and wrapping the fold with tape.)
And how does it work? How do I make use of it? I lay the homemade dripper tube wherever I want the rainwater to be applied. Often, this means that I coil the dripper tube around the canopy edge of a fruit tree. So almost always I use a garden hose connected to the rain barrel, which travels out to the fruit tree, and then the dripper tube is connected to the garden hose.
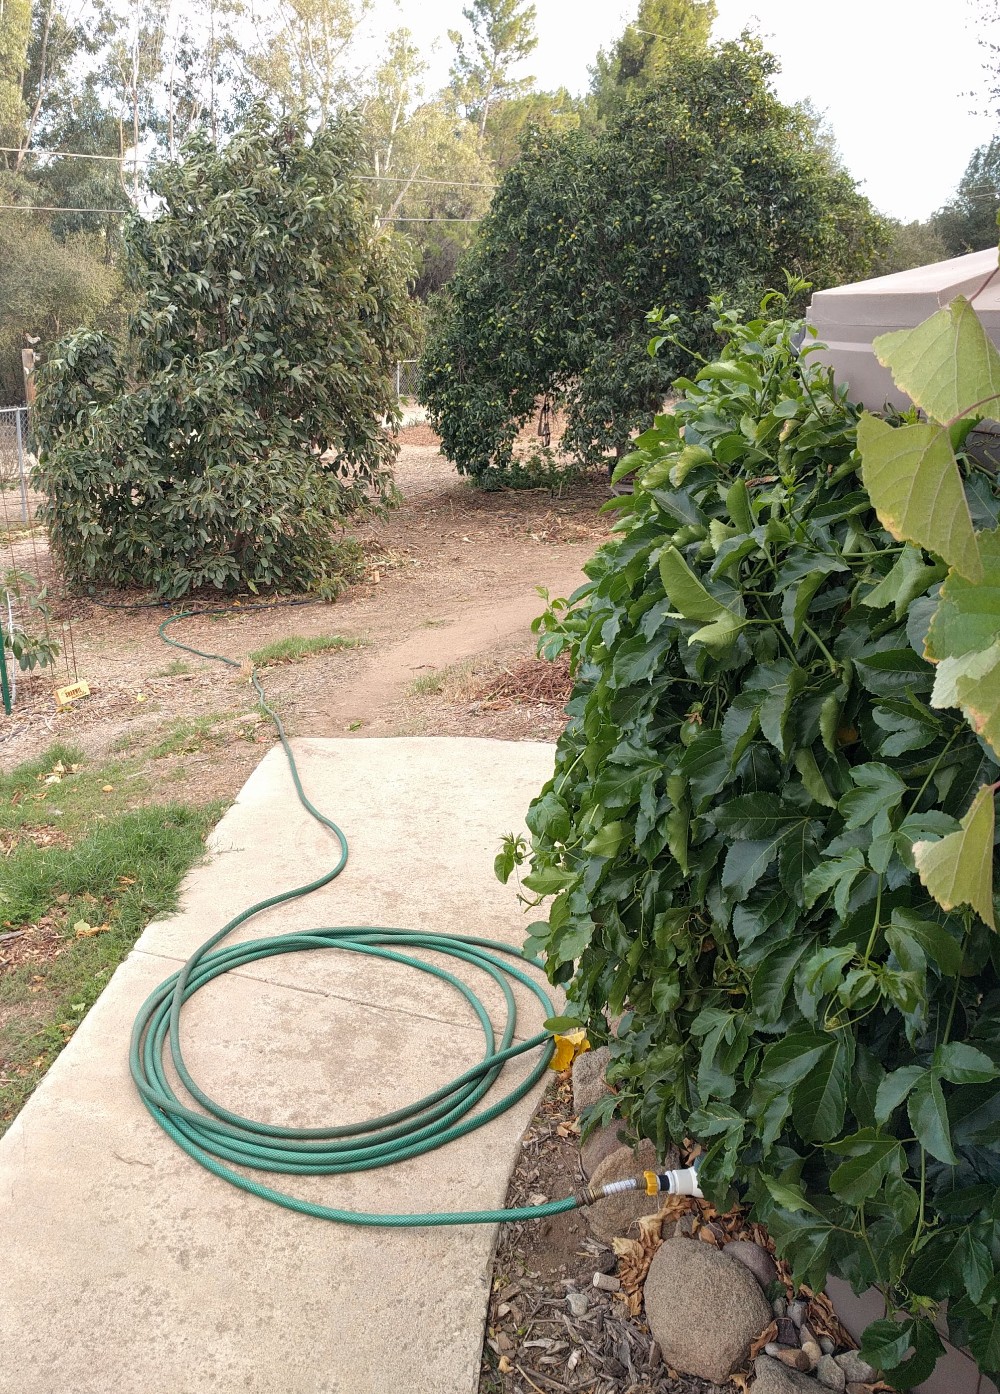
There’s a rain tank hiding behind that passion fruit vine on the right.
Tailor your dripper tube’s holes to your soil
Holes in a poly tube will emit more water than purchased drip emitters in a poly tube because the holes punched with nails are bigger. You probably want this because the bigger holes will still seep water at almost zero pressure. That being said, do design your dripper tube’s holes for your particular soil situation.
Start by punching few holes in the tube, perhaps one hole every two feet. If your soil is clayey, this might be plenty. The water will spill out of the holes and puddle on the surface for a while before infiltrating. On the other hand, if your soil is sandy, like mine, you might find that you prefer more holes, maybe a hole every foot, since the water will go into the soil faster and spread less horizontally. Start with few holes and then add more as necessary.
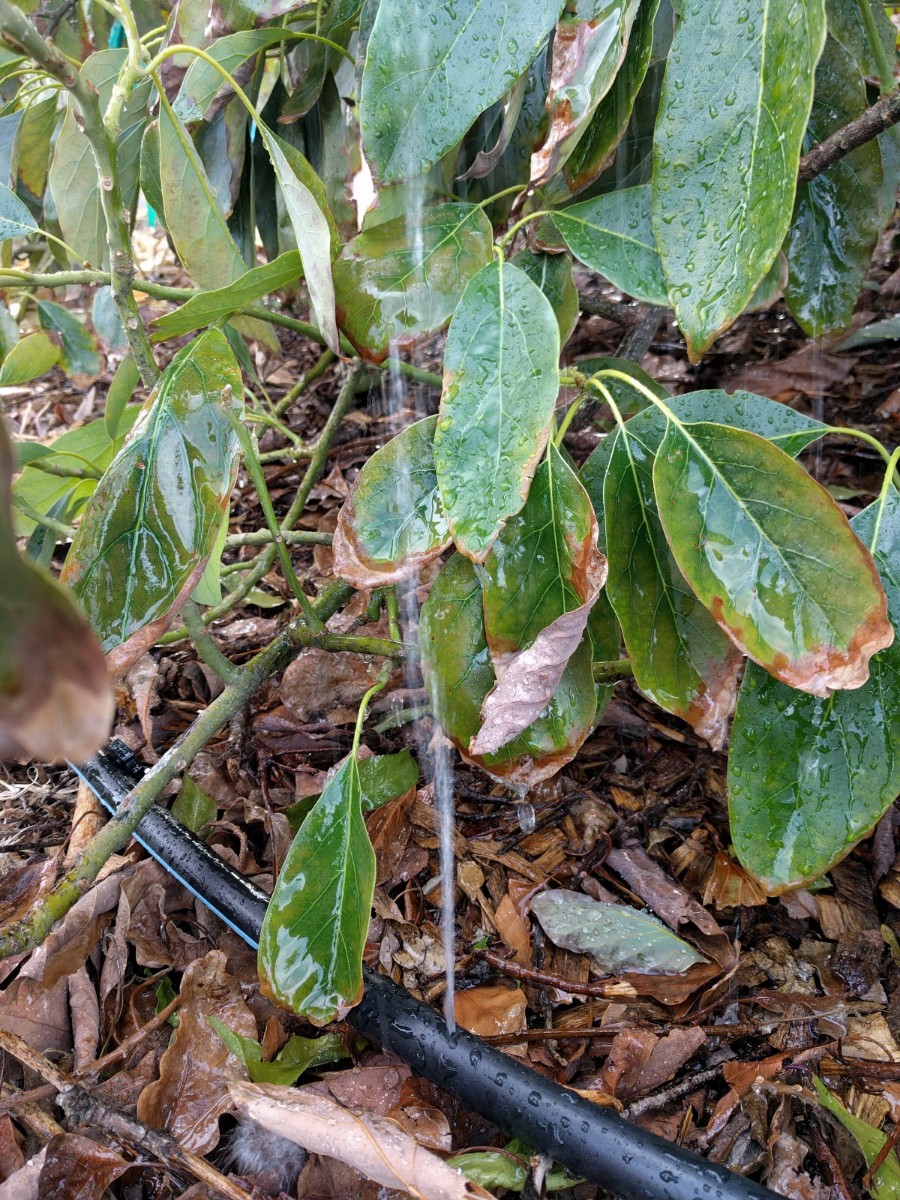
Even at low pressure, water spouts out of the holes.
Extra advantage of homemade dripper tubes on rain barrels
A bonus if you only have a small rain barrel rather than a large rain tank is that these nail-punched holes in the poly tube will emit water fast enough that you can likely use it during a rain. What I mean is, you can have the tube coiled around a tree and connected to your rain barrel with the spigot open and while it’s raining the water will come off the roof, go through the barrel and into the garden hose, and then spit out of the poly tube’s holes. No need to store the rainwater in the barrel.
This is useful because rain barrels of less than 100 gallons in size are inadequate for anything but the lightest of sprinkles on the smallest of roofs. (On a 1,000 square-foot roof, during a one-inch rain, around 600 gallons is shed.)
I have large tanks under some of my house’s downspouts, but I also have a 550-square foot garage with two downspouts and no tanks. For those downspouts, I put trashcans on which I’ve installed spigots (basically, homemade rain barrels) that are connected to hoses and homemade dripper tubes, the dripper tubes being coiled around fruit trees, usually. The rain comes off the garage roof, into the trashcans, and immediately out through the hoses to the dripper tubes and into the soil under the fruit trees. I’m simply redirecting the rain as it falls.
A valve I installed in a trashcan.
What might have been a half-inch rain throughout my yard can become multiple inches worth of rain in whichever places I lay the dripper tubes. What might have been only 60 gallons saved in a small rain barrel can become hundreds of gallons of rain distributed to different parts of the yard.
Warning: Because a lot of rain comes off a roof, and in a heavy rain the roof sheds vast amounts very quickly, you may need to keep the end of the dripper tube open so that the trashcan doesn’t rapidly overflow.
What I do in this situation is open up the end of the dripper tube and prop it up a few feet off the ground, not quite as high as the trashcan’s lip. I use an outdoor chair for a prop sometimes. This way, the water will seep out of the tube’s holes unless the rain is falling rapidly, at which time the rainwater level in the trashcan raises high enough to start spilling water out the end of the dripper tube.
Here’s a short video I took during a rain on December 5, 2018, showing the dripper tube plus some other rainwater harvesting options that I use in my yard:
Last winter, we only got a handful of inches of rain in Southern California. It was one of the lowest rainfall years in recorded history. But by harnessing, transferring, and dripping the rain that fell on my roofs like this, I was able to get more than just a handful of rain inches to most of my plants.
You might also like to read my posts:
https://gregalder.com/yardposts/rain-is-coming-how-do-i-garden/


Thank you Greg! I am going to try this. I have two dusty empty rainbarrels, purchased 2 years ago (!) sitting right next to the downspouts. Such a shame!
Next topic suggestion: easy urban laundry room grey water system. My challenges are not wanting to provide uneven watering to my citrus trees plus how to get the water over to that part of my yard.
Thank you for your great blog.
Hi Amy,
Easily using laundry water in your yard only comes if your washing machine is next to an exterior wall, plus your trees are also close to that exterior wall. Otherwise, it might not be worth the plumbing work and costs, unfortunately.
Here is a post from three years ago about how we used laundry water (“Reusing laundry water”), and today we still do things about the same.
I’ve been thinking of writing a post titled something like “Use graywater because it makes you feel good (not because you’re going to save water or money, which you probably won’t).” It’s just the truth because of the way our houses are built and the fact that water remains cheap. I know we don’t usually think of our water as cheap, but 100 gallons still cost less than one dollar throughout Southern California.
But I hesitate to write this post because it feels negative. I don’t want to be a downer.
I do continue to use graywater in various ways in my yard but, if I’m honest about it, it’s mostly because it makes me feel good.
FYI I’ve linked this post in the San Diego Gardener Facebook group (5200+ members). People are liking it, you should join if you do Facebook
Thank you, Laura. I’ll check it out. I have to admit that even though I have a Facebook account, I’m terribly neglectful at using it. Here’s a good reason for me to visit. Thanks!
Hi Greg, Good post, and I’m in the middle of doing this now too. I had 3 extra hoses for this, but 2 of them are very bulky and don’t lay flat (why I am not using anymore). So I will try poly tubing as you’ve done on yours! See ya, Robert
https://www.facebook.com/1615715543/posts/10216176913688315/
Looking good, Robert. Let me know how it goes.