
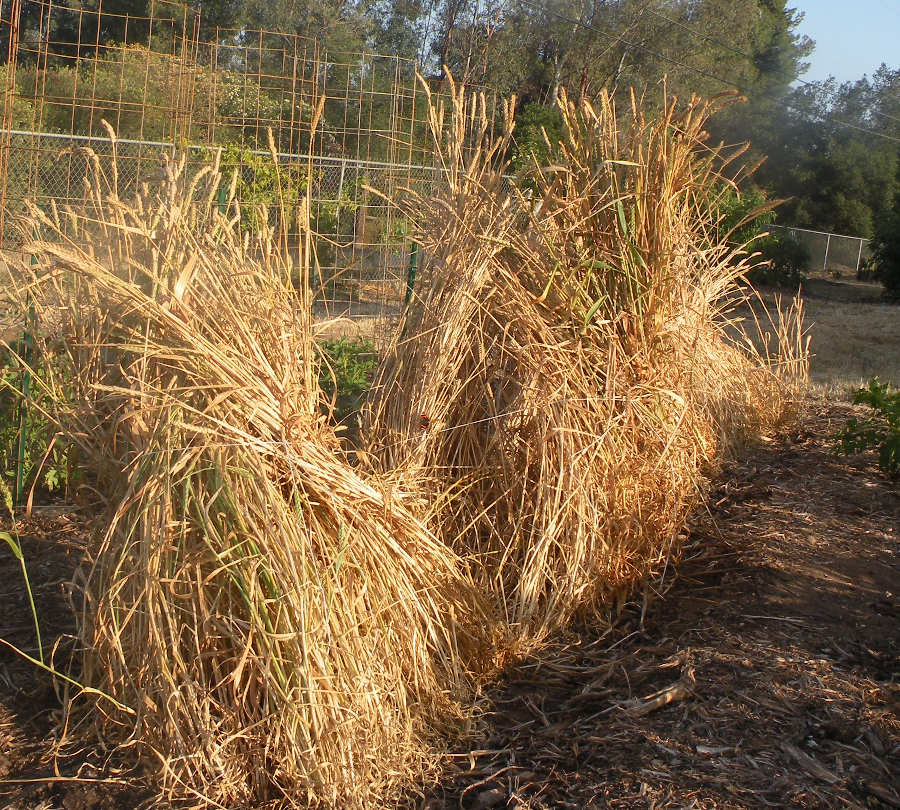
Most staples are laborious to get from the ground to a form that you can use in the kitchen. Wheat, for example, takes a lot of work to dry and thresh and grind into flour. Potatoes, by comparison, are not only easy but the harvest can be as fun as finding treasure.
What follows is what I’ve learned about when and how to grow potatoes in Southern California, after having grown them for many years in different yards in the region.
When to plant
The best planting time is February. But I think of potatoes as having two seasons here — one is August into early September for a late fall or early winter harvest, and the other is February for a late spring harvest.
While I’ve certainly gotten good crops out of planting in August, I’ve gotten consistently better crops from February, for a couple reasons. Growing from February takes advantage of the rainy season, so less watering is necessary. February planting also requires less attention to the plants generally. For example, my last August crop suffered from spider mites because I used drip irrigation and there was no rain to wash the foliage off and I failed to bring the hose out to give the plants a shower frequently (mites infest dry, dusty foliage).
Seed potatoes
What’s a “seed” potato? It’s just a potato, really, except that it is intended to be used for planting instead of eating. You can buy potatoes that were grown specifically to be used as seed.
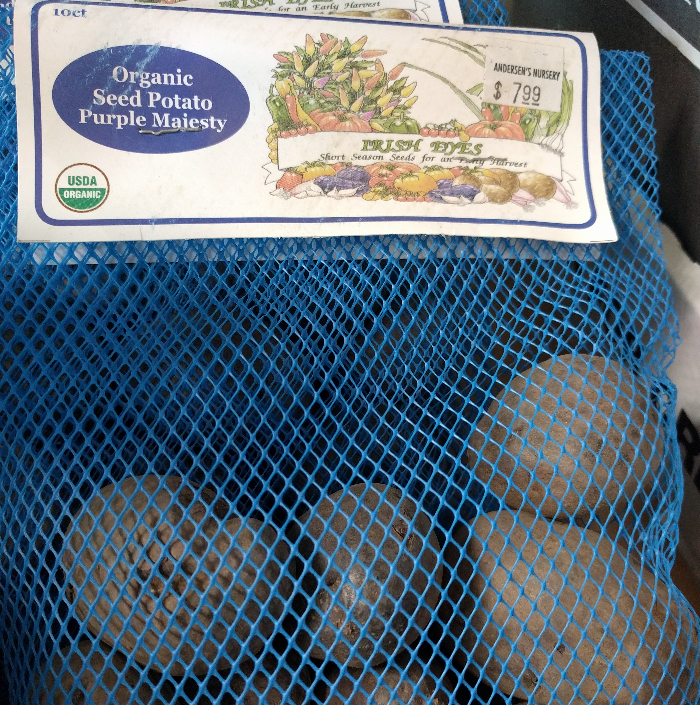
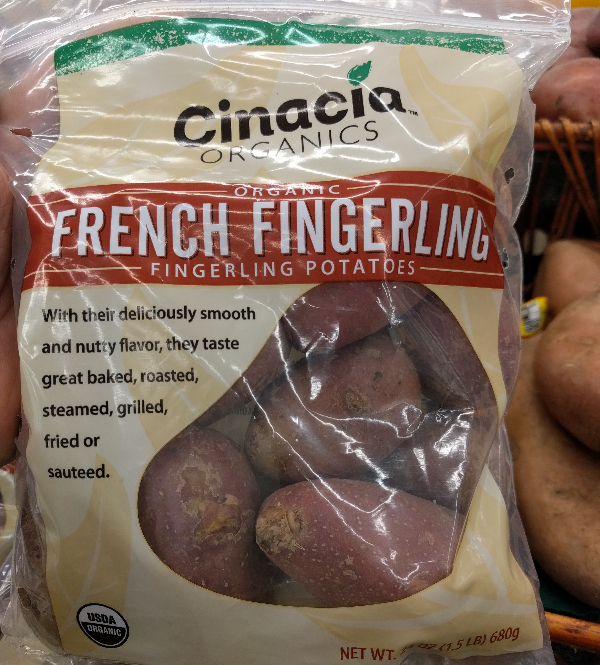
Or you can buy potatoes at the grocery store or farmers market, go home and stick it in the ground and thereby have turned it into a seed potato. When I do this, I try to buy organic because they are probably tougher tubers, not having been protected and pampered through their growing life by the more powerful fungicides and insectides that conventional farmers use.
Many sources claim it’s vital to use seed potatoes that are certified disease-free, but for so long I’ve grown some of those alongside potatoes that I bought from the grocery store, as well as potatoes taken from a previous harvest of my own and used as seed. And I’ve never noticed a significant difference in plant performance or tuber yield.
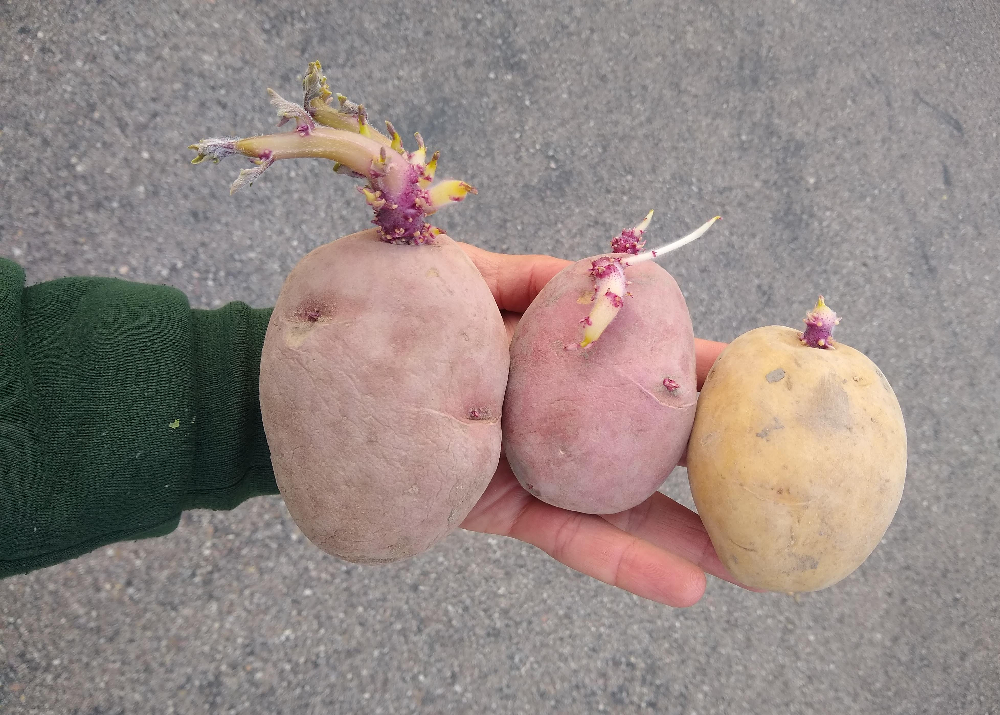
I’ve also found the claim of needing to chit, or pre-sprout, or “green sprout,” the eyes on the seed potatoes overemphasized. When I plant a seed potato with eyes a half-inch long compared to a seed potato with eyes that haven’t sprouted, they both grow well. The seed potato with half-inch eyes just emerges sooner, that’s all.
I suspect that it might be more important to chit seed potatoes in colder climates since those growers are more likely to plant into colder, wetter soil, which makes it more likely that the potato will rot in the ground before growing. Here in Southern California, the soil temperature rarely gets below 50, and in most years it does not stay consistently wet because we don’t get that much rain.
An exception may be if you’re planting into heavy (clay) soil. That is not ideal potato-growing soil. If I were planting into clay, I would wait until my seed potatoes were showing growth. (I would also not plant deep.)
A unique challenge for us Southern California gardeners is that seed potatoes are often not available for purchase when it’s our ideal planting time (February or August). Seed potatoes are usually not available for purchase until March, and they’re sold out in summer, and then some nurseries get new stock in November or December.
What to do? Either plant a bit late, in March, when the seed potatoes arrive. Or, buy the new stock around December and keep it until February; you can even plant it before February if your garden never gets frost, but be aware that potato foliage is very sensitive to cold temperatures. Or use seed potatoes from the grocery store, which are almost always available. Over time you might also curate your own seed potatoes from previous plantings.
A few good online sources for seed potatoes include Wood Prairie, and Grand Teton Organics, and Territorial.
How to plant
When planting, you only need to bury the seed potatoes so their eyes are covered. It’s not necessary to bury them any deeper. I used to bury them deeper, but it never improved yields and it only made me dig deeper to harvest the potatoes. I now usually plant the potatoes so there’s about two inches of dirt covering them. (One exception is for August planting, which I’ll explain below.)

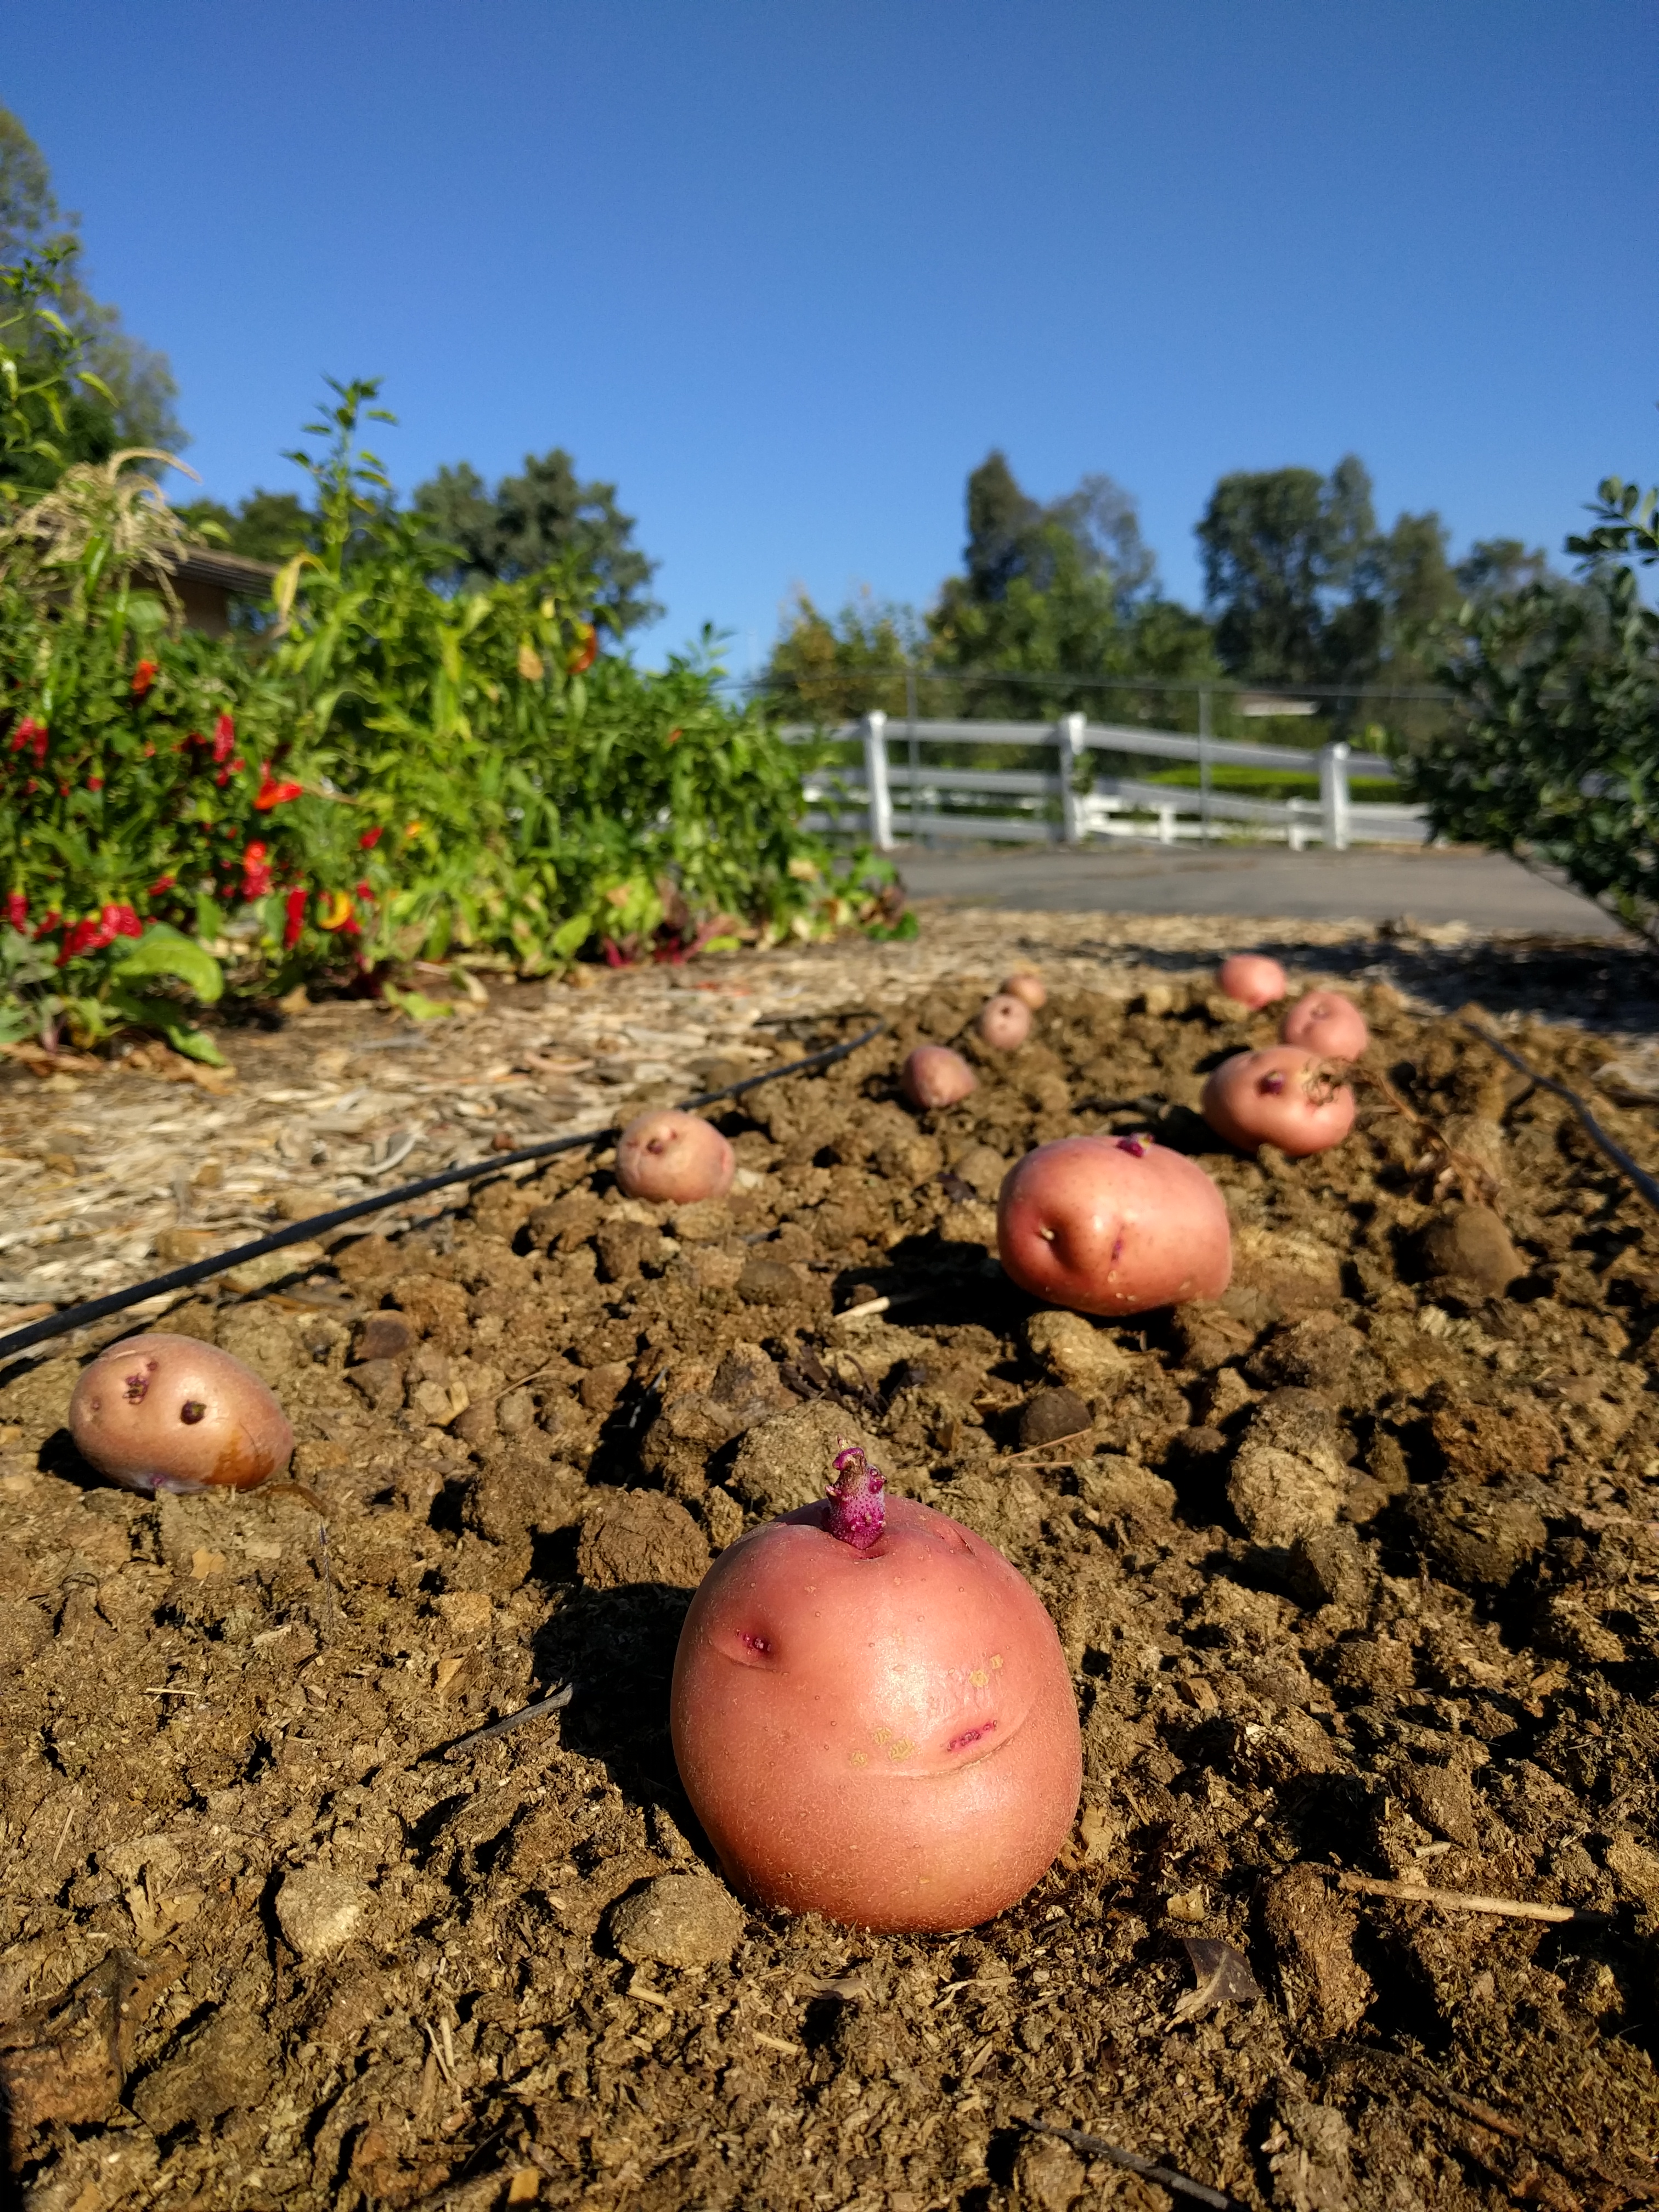

You’ll notice that I didn’t cut up my seed potatoes above, as is often suggested. Mostly, I don’t do it because it’s more work, but sometimes I do it if I don’t have enough whole seed potatoes for the space I want to plant.
Until plants emerge, the soil around the seed potatoes only needs to be slightly moist. In other words, don’t keep it saturated. I’ve made that mistake in the past and rotted the seed potatoes.
For the August planting window, many times I’ve had good results planting right at the base of recently harvested corn. This has become a regular rotation in my garden. In the spring, I plant corn one foot apart, and then in August after the corn harvest, I plant a potato near the base of each corn stalk — so, also one foot apart. The results have always been good. Potatoes seem to like following corn.
Another reason that this seems to work well is that the corn has been shading the soil during the heat of summer and potatoes don’t like to grow in very warm soil. Think of the places we associate with potatoes: Ireland, Idaho, Peru up in the Andes. They are all cool locations. So for that August planting, if I don’t put the potatoes under corn, then I usually bury them a little deeper than two inches because the soil is cooler down there.
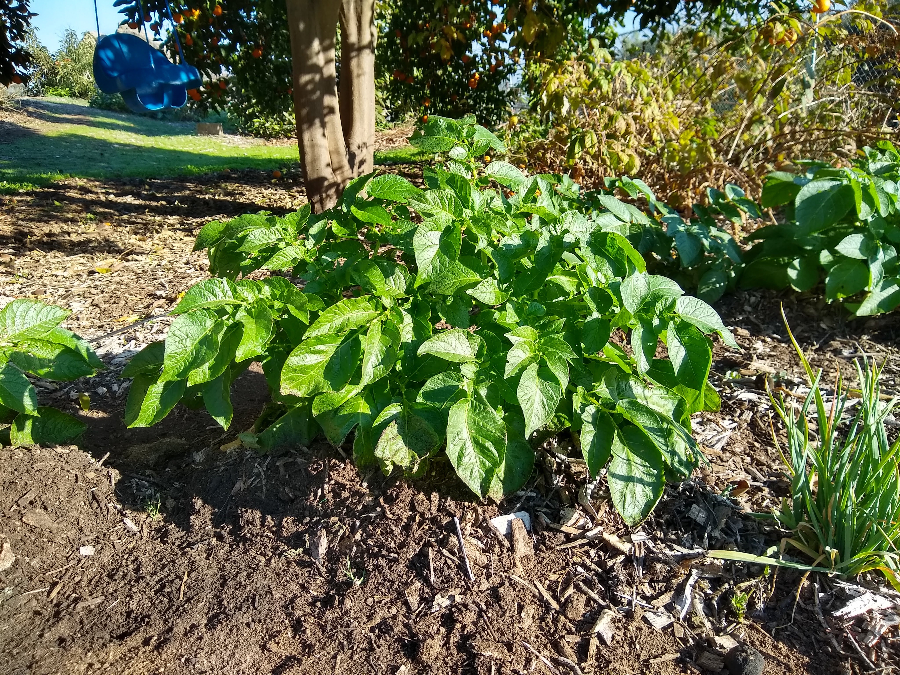
I also often plant my August potatoes under fruit trees rather than in a garden bed because it’s cooler there and it saves space. When I say “under” I mean they’re usually tucked just under the south edge of the tree’s canopy.
(See my post, “Growing vegetables under fruit trees.”)
Hilling up
Over the course of the plants’ three to four months of life, it’s usually necessary to mound up a little dirt or lay some mulch or compost around the base of the plant because the potatoes develop there and you don’t want them to be exposed to the sun. If the potatoes are exposed to the sun, they turn green.
I usually heap up some dirt or mulch on them twice — once when the plants are around six inches tall, and then again when the plants are about a foot tall. If I see a tuber showing at the base of a plant at any time, I’ll cover it immediately.

Watering
These days I use in-line drip emitter tubing where the emitters put out 0.5 gallons per hour and are spaced one foot apart. I plant each seed potato one foot apart so there’s one emitter per plant. At first, I wasn’t sure this would saturate a big enough area in my sandy loam soil, but it works just fine. While small, potato plants don’t need much water. But once the plants are about a foot tall, I give them approximately as much as most other vegetable plants of the same size.
Harvesting
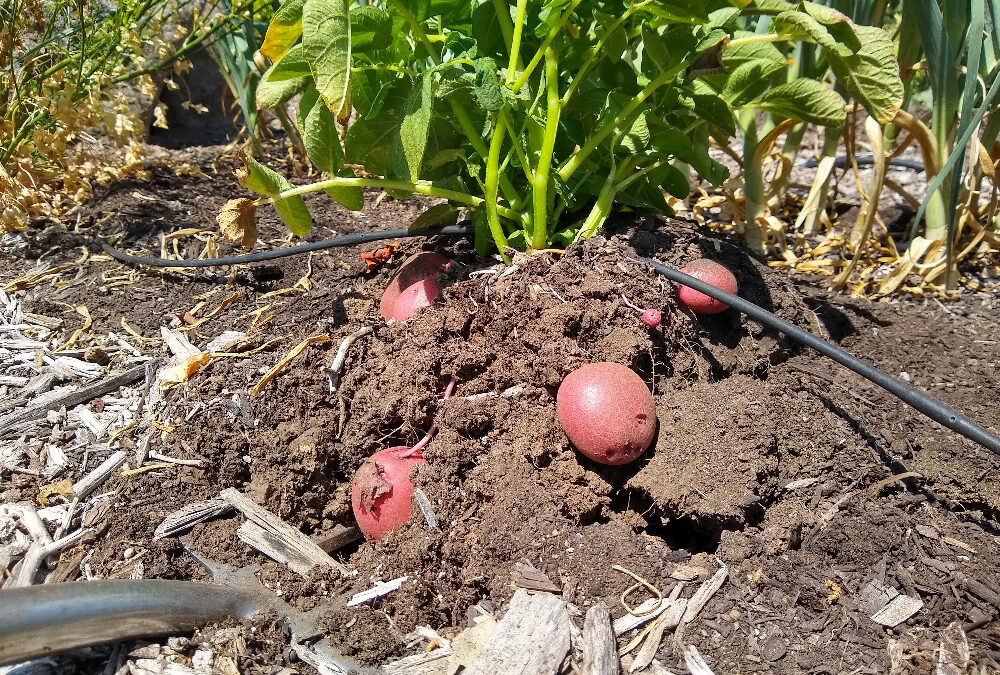
At the beginning of each of my drip lines I have a shut-off valve so I can quit watering the whole row of potatoes once the plants are full sized and the leaves are starting to yellow. (Sometimes, potato plants flower before their foliage begins to yellow.) That’s the indicator for harvest time: the potato plant foliage starts dying.
Harvesting is easier when you can dry out the soil around the potatoes for at least a week or two prior. The tubers then pop out of the dirt very cleanly — no cakey mud on them that needs to be scrubbed off.
If you really want to eat some potatoes before the plant’s leaves have started yellowing and dying, you can. Harvesting early like this is called harvesting “new” potatoes. The tubers will be smaller and more delicate, and the skin will peel off easily so be gentle.
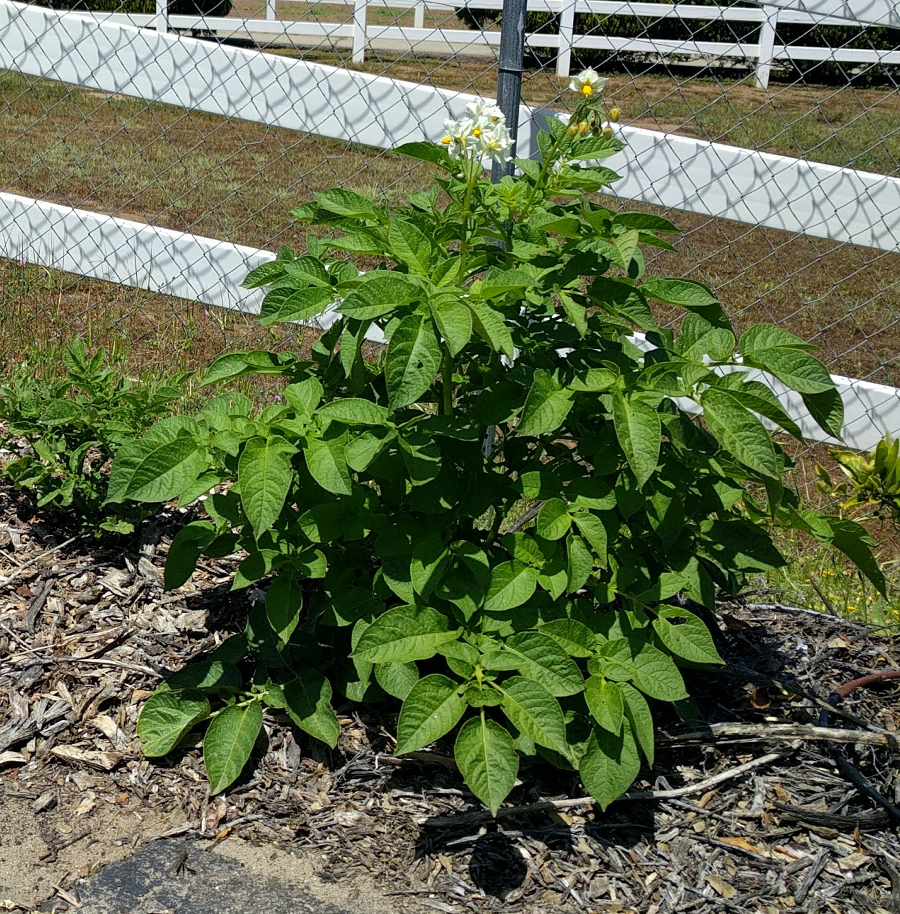
Not all potato plants flower, but if one does, that indicates that the tubers are probably at least the size of ping pong balls.
From a February planting, most potato varieties will be totally mature and ready for harvest in late May or early June. From an August or early September planting, they might be ready around Christmas.
Storing the harvest
Potatoes like to be stored in soil-like conditions. That means cool, humid, dark.
If harvesting in winter, you can actually leave the tubers in the ground for weeks and “store” them there. I’ve done this many times.
For the May/June harvest, it’s harder to keep the tubers from sprouting for more than a month or so. Putting them in paper bags in the fridge works, if you have room. Putting them in a cupboard on or near the ground is second best.
Potatoes may not keep as long and as easily as wheat, but at least they’re easier to harvest and eat!
Thanks for your support so I can keep the Yard Posts coming and the ads away.
All of my Yard Posts are listed HERE


Thank you for the guide. Clear and to the point.
Thanks, Evan. I just added a few photos from this year (2017) that will hopefully make things even clearer.
I’ve just started this last year with potato’s from the grocery store and also from seed.
Yesterday we harvested one section and had the best baked potato ever. Real taste. So much fun. Thanks for sharing your joy
Hi….I started growing a sweet potatoe in a glass and it has gotten so big! I might have to move it to the terrace; however, will it die from the cold weather at night? I live in So. CA…it is just getting too big for my apartment. I really am not concerned with harvesting potatoes, I just like the greenery and how fast it has grown! I have to transplant it already….it is starting to cling to various objects nearby…a screen, etc. If I were to transplant it, would the planter need watering holes at the bottom? Yes, I am ignorant with growing anything green…teeheehee
Hi Whitney,
You can put sweet potatoes outside now in most parts of Southern California. I have a volunteer sweet potato growing in my garden that just popped up a couple weeks ago.
The planter doesn’t need holes on the bottom, but it’s easier if it does. If you water too much and the planter doesn’t have holes in the bottom, then you end up rotting the roots of the plant.
Yes, I would consder Transplanting. Maybe consider getting some shock treatment though because potatoes don’t like to be moved. Just like any other plant you risk roots getting shocked.
Thank you for your post! I just went into my side yard to turn the soil over and start getting ready for planting plans. And I noticed a few left over potatoes had already started growing. I’ve kept about 10 growing in the house that have fully sprouted and was definitely thinking about planting them now. I see what you mean about waiting till after the rain although I do plant mine in pots. Love these reminders and all of your tips!! Now I’m trying to decide if I should so my herb seeds directly into soil or if I should sprout them first and then plant.
Thanks, Kelly. I failed to mention in the post that potatoes love to grow in pots. I’ve grown them in pots a few times and my mom has had good results growing them in trashcans.
Now might be as good a time as ever to get herbs to germinate from direct sowing in the ground since it’s predicted to be wet for the next week. Good luck, whichever method you choose!
Hi Susan
We have gophers so we grow our potatoes in growbags with great success.
There are Digger’s 5-Gallon Heavy-Duty Wire Baskets you can get on Amazon but they are $$$. You could make your own if you’d like to grow in the ground.
Gophers will also eat other veg – we watched in horror as our only Sungold got pulled down in the ground!
Happy growing!!
Susie aka cooknwoman
Excellent point we also have rabbits here in Lake Elsinore. I know that people who have larger yards against the highway (sometimes)get coyotes and they will eat almost anything, or they will at least foil over it.
Hi this is my first time growing potatoes. My yukon gold plants are starting to die now, but I’m waiting for them to die down more. Are we able to cure and store potatoes here in SoCal, in June? If not, how long do they last in the fridge inside a paper bag? Thank you for your article 🙂
Can you use the potato roots and dead foliage in your compost bin? Excellent article
Nice article! Wish it included some thought on the soil that is very clay I live in Southern California but close to the mountains in about 4,000 for elevation. Wish I had sandy loan soil – and NO GOPHERS! This year though we are growing in grow bags which I’ve done before with great success!
Hi Susie,
I can relate to the gopher struggle. It plagues my yard too. The Cinch Trap is my favorite weapon, as I detailed here: https://gregalder.com/yardposts/the-best-gopher-trap-its-a-cinch/
On the other hand, the clay soil is a condition in which I’ve never grown potatoes. But I know people who have, and they say that they get best results by planting on mounds (to increase drainage) and/or NOT planting the seed potatoes deeply. They just settle them into the soil surface and then mulch on top with straw or wood chips. Seems like both practices are achieving what the grow bag would too.
I would think that you’d have to be extra careful not to overwater and rot the seed potatoes in clay soil also. Does that align with your experience?
Susie, we have clay soil also. Did you have any success growing your potatoes? I want to try the purple potato variety.
I live in Redlands CA, and they don’t call it RED lands for nothing… very high in clay. I’m going to follow some of the great suggestions stated in the article using Purple or “Blue” potatoes (type 2 diabetes thing). I am buying large bags of planting soil at Lowe’s to mound up. I will probably till some of the clay into the garden soil with some manure.
Please tell us how it goes, Schneb.
I know this is an old article but I live around the corner in SB/highland right @ the foothills and b/c of gophers I don’t grow my spuds in the ground. I started in small containers with sandy loamy soil then moved to a large on the ground planter with thick wire on the bottom. It’s about 3ft deep with soil, and the box is 4’x4’ (it has greenhouse attachments too) . I’ve had great success with red and white potatoes, but only moderate with russet. I hope this helps.
Some good suggestions, Jennifer, thanks!
Any success my fellow Redlander
Great info! I’ve been wanting to have a go at potatoes but have hesitated for two reasons – 1. The extra work in digging low and deep to harvest and 2. Remembering during the right time to catch the right season. But I have lots of mulch and it’s early September and I just finished up some corn – everything is aligning!
One question – have you have better results here in zones 9/10 with a specific variety?
Thank you for such an informative post!
Hi Kara,
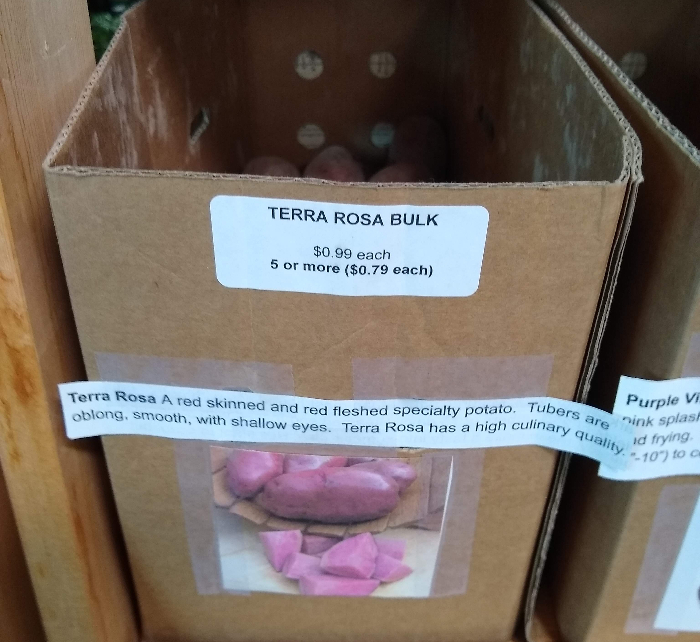
Thanks! I’m trying to think of any varieties that I haven’t had decent results from, but I can’t. I’d just grow whichever kinds of potatoes you like to eat most. For us, that’s red potatoes in general.
For the last couple years, I’ve been growing mostly red potatoes — the specific variety, I don’t know — and I keep the healthiest, biggest tuber from each plant’s harvest to use to sow the next round.
Hope you harvest some nice potatoes this season!
Where do you purchase your seed potatoes please
Thank you
Hi Sharon,
I’ve mostly been using my own potatoes as seed or those bought at a grocery store or farmstand. It can be hard to get seed potatoes at the right time in Southern California, but your best bet is to visit a local nursery and ask when they’ll have some; they often sell out fast. I don’t know anywhere online to order from who will ship at the best time. You could order some from Territorial and you might get them by the end of March. You might get a decent crop out of that: https://territorialseed.com/collections/potatoes
I am ordering plant bags. I want to grow potatoes. what are your thoughts on using the bags vs ground?
Hi Dianna,
I think the plant bags would have a couple advantages over growing potatoes in the ground. It would be easy to add soil or compost or mulch as the plants get taller. And you can put fast draining soil in the bags, which might make growing potatoes easier if you have a heavy soil in your garden.
I’ve never grown potatoes in plant bags, but I have grown them in trash cans with holes in the bottom and that worked acceptably.
Do you recommend starting potatoes in SOCAL between May and June?
Hi Artie,
You can try potatoes now, but they’ve never done quite as well for me in this window compared to a late summer or late winter planting. Still, I do end up planting some potatoes all year because I often plant them under fruit trees and whenever I harvest a plant I put one of the tubers back into the ground that same day: keeps the process going.
Interesting that you plant directly after harvest. I’ve read that rotation is necessary.
Hi Wiley,
I’ve also always been told to rotate, but I stopped deliberately rotating (potatoes and every other crop) a handful of years ago and I haven’t seen any difference. Maybe for home gardeners it’s not as important as for farmers who grow acres of the same crop in the same location year after year after year.
I agree. You are very insightful and practical. I enjoy your knowledge. You’ve been so helpful through the years. Thank you.
Hi Greg,
I’m in Vista, on about 1/3 acre with a yard full of decomposed granite. (What a waste! But someday I hope to have a bounty out there!) I want to try my hand at potatoes so will plant them in some type of container. I have 2 questions:
1- How often do you water them?
2- What are your thoughts on the “no hilling” technique, where the pot is filled with soil at the time of planting, eliminating the need to hill later? Some gardeners claim to have great success using this method.
Hi Donna,
Vista sure is a nice place to garden. Potatoes need water about as much as most other vegetables. The only difference is that in their early stages they need little water compared to when the plants are big and the tubers underground are growing.
Even if you grow in a container, you’ll want to do a little hilling because the developing tubers will show above the soil and go green from the sunlight exposure. But in a container it won’t really be hilling, it will be just adding some more soil around the plant in the container. Instead of soil, you can always add compost or mulch too. This is what I often do and it works great.
What type of soil and fertiliser do you recommend? I live in Los Angeles and am also planting them in a 5-gallon container bag. Also do you have any other suggestions when it comes to buying/creating your own “seed potatoes” from the grocery store?
Hi Eric,
If growing in a container, I would choose a light soil mix because a heavy soil seems like it might be harder to water appropriately. Potatoes sure grow well when the soil has lots of compost so I would choose that, or a fertilizer that includes a lot of compost, to add to the container soil.
In fact, you’re making me curious about growing potatoes in containers right now. I haven’t done so for many years. Later this summer I’m going to grow some potatoes in five-gallon pots just to re-experience it.
My favorite seed potatoes to buy from the grocery store are bags of small red potatoes that are labelled organic. I’ve always had good results from those.
HI Greg,
Thanks for the really informative article. I’m planning on trying potatoes this year. I was planning to use 15 gallon containers, but you’re thinking 5 gallons might be adequate? Even better! Also, I have a bed that’s been neglected for longer than I care to admit, but you may have given me the incentive to wake up the soil a bit given your suggestion that you don’t need to dig all that deep and can simply mound up instead; nice idea!
Regarding the potato selection. I’m partial to Yukon Golds, so (as you said with the red potatoes) all I need to is get a 5-lb. bag of organic potatoes and simply plant them provided that they have some semblance of an eye? No need to a huge eye? No need to cut it up into smaller pieces and wait til it scabs over?
David
Hi David,
A 15-gallon container would be better than a 5, but I’m guessing I can get away with a 5. We’ll see. In the past, I’ve used bigger.
No need to have sprouted eyes, but if you do then the plants emerge and grow earlier.
No need to cut them up either, but if you do you get more plants from fewer seed potatoes. And if you cut, no need to let dry. You can stick them in the dirt straight away. (I know that letting dry is common advice, but it’s unnecessary.)
Thanks much for your reply; very informative.
I ordered a bag of organic potatoes from Costco. They arrived today. Perhaps I misread the information; the potatoes are “baby creamers;” bite sized potatoes.
Should I try to plant these as my seed potatoes or eat these and get full sized potatoes (from sprouts or some other supermarket?)
As always, thanks in advance for your advice.
Hi David,
About golf ball size is the smallest seed potatoes that I usually use. But here’s what a seed potato farmer that I’ve heard interviewed and who seems very reliable has to say: the seed potato should have no less than two eyes/sprouts; it should weigh around 1.5 ounces; a large chicken egg weighs 2.5 ounces so you could cut a seed potato of that size in half.
This comes from Jim Gerritsen. Here’s more of his potato growing advice: https://woodprairie.com/downloads/Growing_Guide_2020.pdf
I grow potatoes (& sweet potatoes) in those big black plastic planter pots. When it’s time to harvest I just dump them out, remove my potatoes, and put the little ones and the ones with some root or stem back in the planter pot. Really easy and no skewered potatoes from a pitchfork. The soil here in West Los Angeles is blue/black heavy clay. In all my gardening in the yard or in pots, I add Gypsum which breaks down clay, some coarse rinsed sand, Leaves from my avocado tree, manure and Amend™, some 16-16-16 fertilizer. I only use the additives in the top 1/3 of the planter.
GOOD MORNING. I tryed to grow a potato in a 5gal pot. First timer.I had a red potato from the store that sprouted. So I got 5gal pot from the gardener. I mixed potting soil & manure and a little 16x16x16 fert.I put about 6″ in the bottom, put the potato in the center and filled in the rest. It grew great when the top died I dumped the bucket. five potatoes about 50 cent size and three had sprouted. What did I do wrong?
Hi Greg, first off thanks for your excellent sharing of your observations, experience and experiments. Youve been a great help getting back into gardening this year.
I particularly appreciate your pragmatic approach and willingness to shrug off the accepted wisdom when it doesnt work or apply or be necessary. So many others just seem to repeat the same old shiboleths!
Anyhow its been a very gratifying garden year with pounds of good food every day.
Many meals almost everything on the plate is from the garden, and that is an incredible good feeling.
What ive learned this year is that consistent picking and consistent water seem to be the key to bountiful harvest. In the past i was pretty stingy with the water. This year ive been moving some things onto drip lines and have been using an Excel spreadsheet to keep track of the watering of all the different plants. That in itself has made a huge improvement.
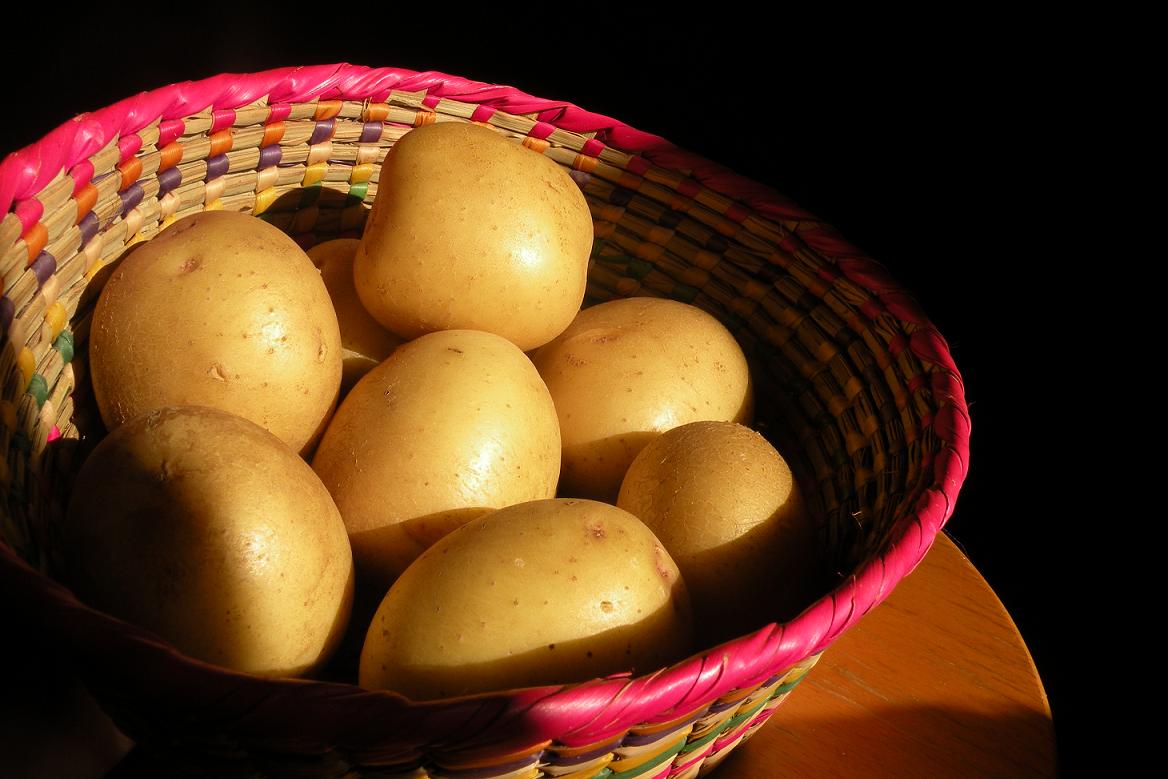
Had great enjoyment growing and eating my first potatoes. Yukon golds. Got “organic seed” from Trader Joes. Good to hear that you believe that it is ok, I was concerned about doing it again.
Great to hear this, Steve. I can totally relate to your feelings about water and consistent harvests as being important. I’m also inclined to be stingy with water, but I’ve gotten better with that in the last two years. And I find that making harvest a part of my morning routine helps because then I harvest every day, and I harvest at a good time (lettuce harvested in the afternoon is often a limp waste).
Great. Thank you very much. As always, you provide great information. I will use the potatoes that I have. And as you recommended, I will plant then even if they don’t have any eyes.
Wish me luck.
David
I am a very inconsistent gardener and have very little space. I tried rooting a rose stem in a potato in soil in a cup (something I read somewhere and my son had given me a old rose that had scent). It didn’t work but up popped a little potato plant. It got planted in our small yard and it is “growing like a weed”. I found this website when looking for when to harvest potatoes since obviously you can’t see them. Who knew – I will look for yellow leaves in the fall. We live right on the coast – can’t get any closer – so we have sandy soil. But coming from cold country we have always assumed potatoes don’t grow here. This may be a big surprise. And its not a bad looking plant in the process. I will let you know if it harvests.
Hi Win,
That’s so fun. Potatoes are always surprising me too. Maybe it’s mostly because a lot of the action is happening under the dirt and out of sight, like you said. Let me know what you end up harvesting.
I’m in the desert (sandy, too). Potatoes will grow but need major work to get a crop in sandy soil. How’d you make out?
I live in Anaheim and I was wondering if I could plant ? potatoes ? in September?
Thank you ?
Hi Christi,
For sure! September is a nice month to plant potatoes in Anaheim. The only risk is that a cold storm could come through in December and frost the foliage back, but by that time usually the plants are big enough that the tubers are big enough to harvest anyway.
hi, wondering whether you are still growing potatoes from “seed” purchased at the grocery store? seems like there ought to be a seed potato source for those of us who can start a crop in fall 🙂
If you are, it must be that your crops are good but still limited to varieties sold commercially. I keep hoping a farmer’s market will have someone selling other varieties but no luck yet. Thanks!
Hi Gene,
Yes, I still use grocery store potatoes for seed sometimes. More and more though, I’ve been trying to save the best tubers from my harvests to use for seed the next round.
It really is too bad that no one is selling seed potatoes for us who can start a crop here in the fall. I’ll let you know if I ever find one.
thanks for letting me/us know. that’s great that you are being selective in your seed potato saving; you’re likely to end up with a potato well adapted to your growing conditions.
Turns out that Peaceful Valley Organics (Nevada City, California) DOES sell seed potatoes in the fall! As well as garlic and onions.
This fall (2022) I will do both, buy some certified seed potatoes and also plant some from grocery store organic potatoes.
Thanks, Gene! Looks like Peaceful Valley will ship their seed potatoes after October 28, according to their website: https://www.groworganic.com/collections/organic-fall-potatoes
In that case, you’ve got to make sure your planting site gets no frost in a usual winter or else those young potato plants will be mush. For parts of my yard, for instance, I can grow potatoes through the winter but for others I must plant by early September or else wait until February because of frost risk. Potato foliage is very sensitive to cold.
Hi! I appreciate your article and experience on growing potatoes as I live in central CA.I have been an avid vegetable gardener for years but have to admit that I have not been to successful with growing potatoes. I had beginners luck with Viking potatoes years ago but since then, managed to rot them or not produce tubers. 2 years ago I grew some in an 18 gal tub. It suddenly died when it turned hot. I found 120 small rotting potatoes. I was quite bummed! I am about to try again providing less water and more drainage. Any suggestions? Can you grow mid season varieties in CA and get big potatoes ( one website states you can only grow new potatoes in CA)? Are early varieties the only ones we can grow? Please indicate the best potatoes from your experience. Thank you.
Hi Greg,
I was wondering if it’s too late at this point to put some potatoes in. I think it probably is but wanted to get your opinion 🙂
Hope you are enjoying the warm weather!
Best,
MB
Good question, MB. I continue planting potatoes under my fruit trees now and through the summer, and they do okay (but never as good as those planted in the garden in February), but they don’t do as well if planted in my garden beds this late. Maybe it’s because they get too much sun and heat in the garden beds whereas they’re a bit cooler and in partial shade near the trees in summer.
So for you, I’d say that if you have potatoes that are sprouting, go for it and see how they do but don’t expect optimum results. Or if you’re thinking of buying some seed potatoes, go for it and plant a few in full sun and a few under fruit trees and see if your results are like mine. But I wouldn’t allocate much of your precious space to potatoes this late because I’m fairly certain that they won’t produce optimally for you.
Thanks Greg! That makes sense! I do have some leftover seed potatoes that are sprouting heavily so I wanted to get your opinion on if it would be a total waste or kind of not optimal. I’m going into it with no expectations so we will see how this does 🙂 … it will definitely generate more notes and learnings for my yearly gardening notebook 🙂
Hi Greg,
Fun reading some of the older posts with newer add-ons. Regarding seed potatoes and
availability, I read organic potatoes seed better because they aren’t sprayed to prevent germination. Bought a 3 pound bag of small russets (Food 4 Less) and set them aside and they all started sprouting within 3 weeks. Now I know when to buy them for August planting (Del Cerro.) I will plant these even though they will be early. Unless you have a better way to retard the sprouting for another six plus weeks.
Hi Ken,
I think you should just put them in the ground once the sprouts are a couple inches long. You should get some production though probably not as much as at other times of the year.
The potatoes I planted in the winter will be ready to harvest in a week or two. They were chewed on so badly by earwigs and pill bugs this year. I’m curious to see how that affected their yield underground.
Can I plant potatoes in early January in lakeside CA
Hi Kenny,
Yes, but . . . know your yard. If you normally get frost in the winter, then if the potatoes sprout and there is a frost, those sprouts will get damaged.
I wait until February to plant mine in order to avoid that. (But I’m in Ramona and a bit colder than you.)
Great article! Looking forward to planting some supermarket potatoes as a winter crop. I just started winter gardening and it’s fun.
Great Post even though i may not be planting any I throughly enjoyed your post, the comments, and follow up answers, as always.
Can wait to see those “calendars”. !!!! Great work !
Hello
Can I buy and plant any type of potato sold in a market in in California? I have heard certain type wont grow well in California!
Thanks
Super helpful! Thank you!!
Hi Greg. How much sun do potatoes need? I was just given some now that have sprouted already and it’s now mid May. I want to grow them in a fabric grow bag under my patio awning, an area that is always shaded. Is that too much shade? Would they do ok throughout the summer? Thanks!
Oh and I’m in central San Diego.
If anybody’s looking for a really good go to seed potato supplier, I’ve been getting mine from Grand Teton Potatoes. Organic and really fairly priced ! They have a great selection.
Hi Brian,
Potatoes will grow in the shade but be less productive. I grow many potatoes in partial shade under the canopy edge of fruit trees and they are always less productive than those I grow in full sun in my vegetable beds. Yes, you can grow them through summer although that is not the best time.
well written, thank you. I did just buy yukon seed potatoes at home depot in February. I also seem to leave one or two spuds in the ground, so those plants come up fine on their own.