
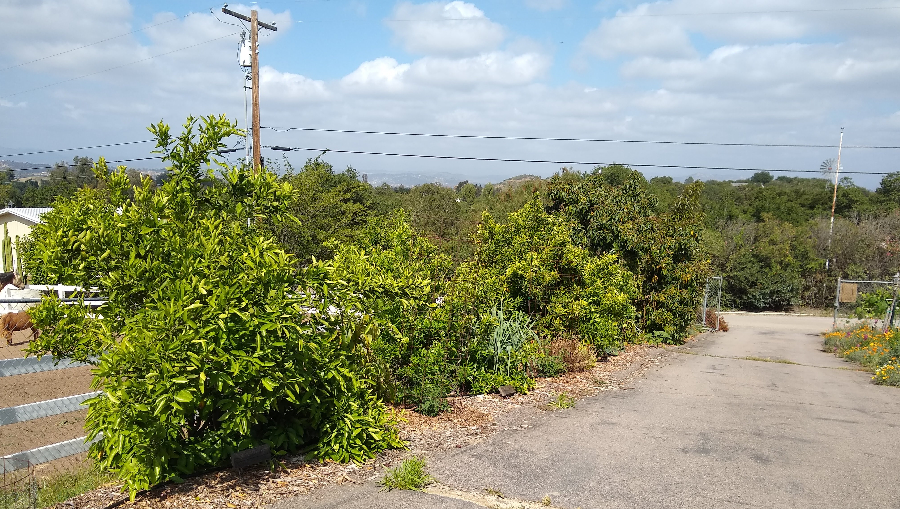
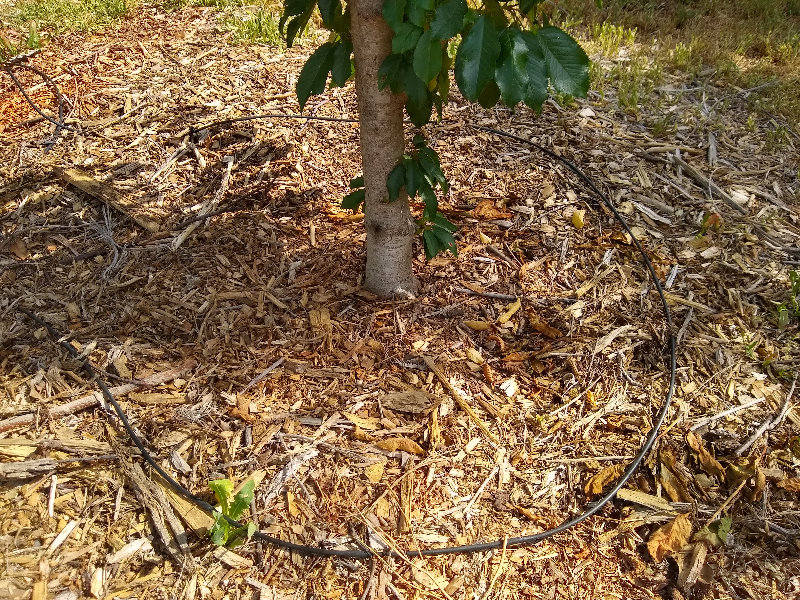
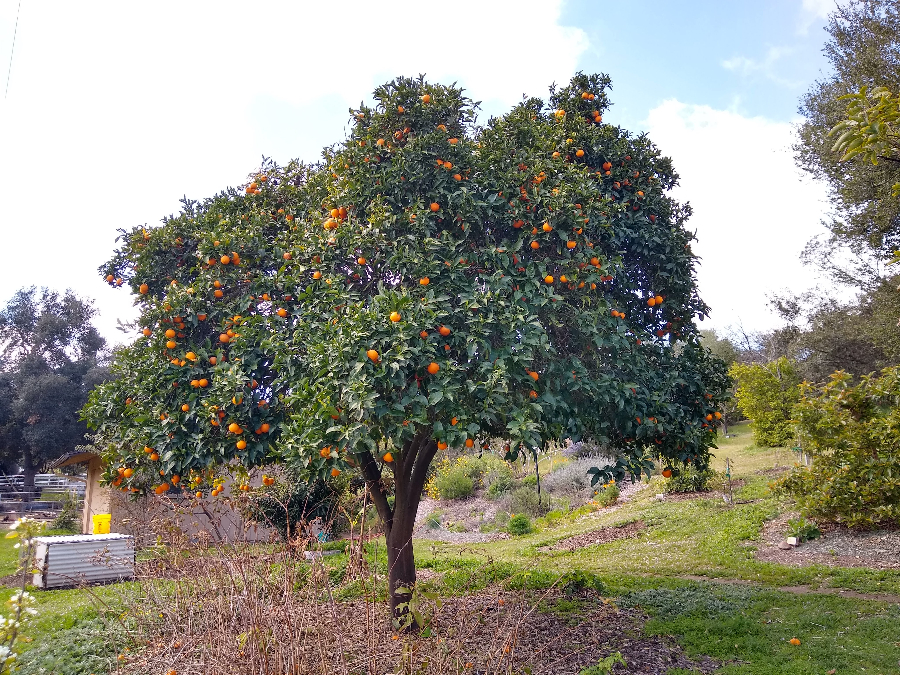
I water about half of my fruit trees with mini-sprinklers while the other half is on drip irrigation. For example, the citrus trees along my driveway pictured above are all on drip. In this post, I’ll explain why I use drip on many trees, and I’ll give you my best advice for how to set up drip on your fruit trees as well as how to run it successfully.
What is drip?
Before moving ahead, very briefly let me say what I mean by drip irrigation for fruit trees. I’m using a narrow definition in this post. By drip, I mean a single orifice that emits some water. So you can have a black polyethylene tube that you punch drip emitters into or you can have a poly tube that has emitters built in (“inline” drip tubing, or “dripline”).
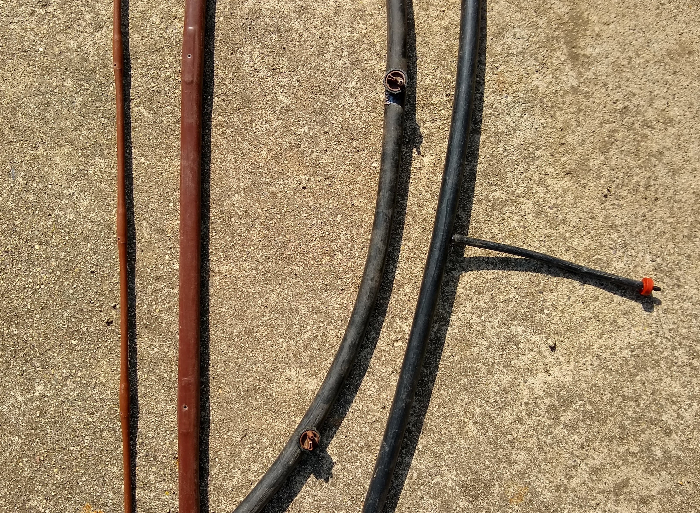
But I’m not talking about micro-sprinklers, bubblers, little sprayers, or adjustable octopus-type emitters.
Advantages and disadvantages of drip irrigation on fruit trees
Some of the advantages of using drip irrigation on fruit trees are that you can use water more efficiently because you are not losing much to evaporation (compared to sprinklers); you can run the irrigation at any time of day because the wind doesn’t affect it (compared to sprinklers); and it’s easy to calculate how much water you are giving each tree (count the emitters and multiply by the output per emitter).
A few of the disadvantages of using drip irrigation on fruit trees are that the emitters can clog, especially those in quarter-inch tubing (emitters in half-inch tubing clog far less, in my experience); your chickens scratch around the tubes and move them; and it can be more work to adjust drip as trees grow bigger (compared to adjustable micro-sprinklers).
Physical layout of tubing and emitters
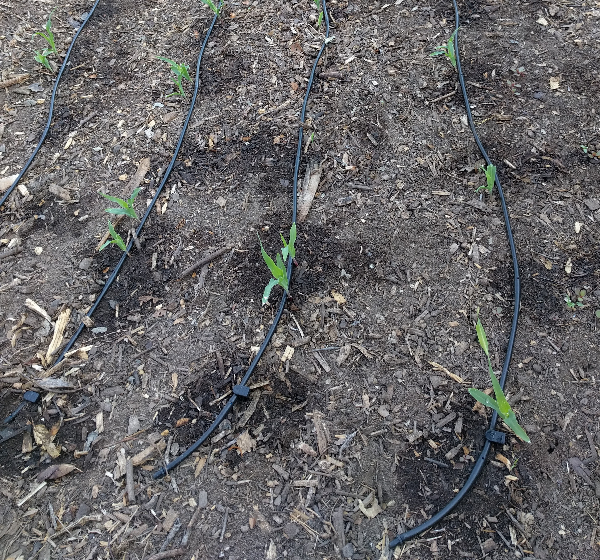
Farmers and gardeners use various ways of laying out tubing under their fruit trees so the emitters are in the right places. I’ve used every one of these methods, and they all work.
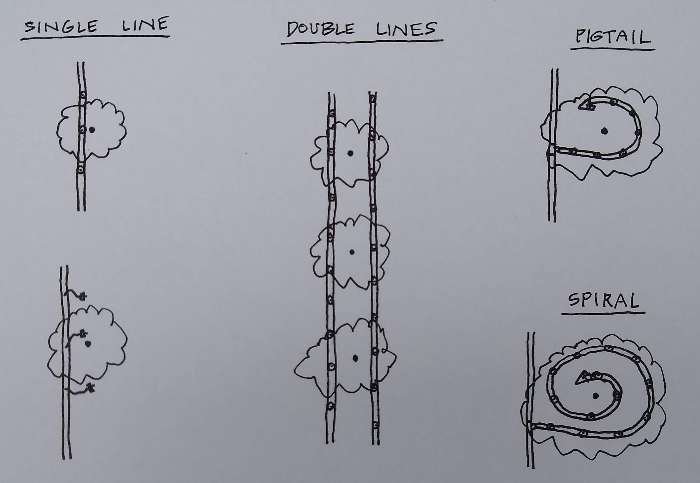
If your fruit trees are in a line and close together, I’d choose the single or double lines layout. If not, then pigtails are probably best. I use mostly pigtails (or rings) on my trees.
How drip works
For me, it was not obvious that drip irrigation could work to effectively water a fruit tree when I first tried it. How could a tree be satisfied just getting water at a few points under its canopy?
But drip does work. That’s undeniable. I’ve watered so many trees for so many years successfully with drip that there’s not a shadow of a doubt left.
(There are also many large farms across the world attesting to the effectiveness of drip on fruit trees.)
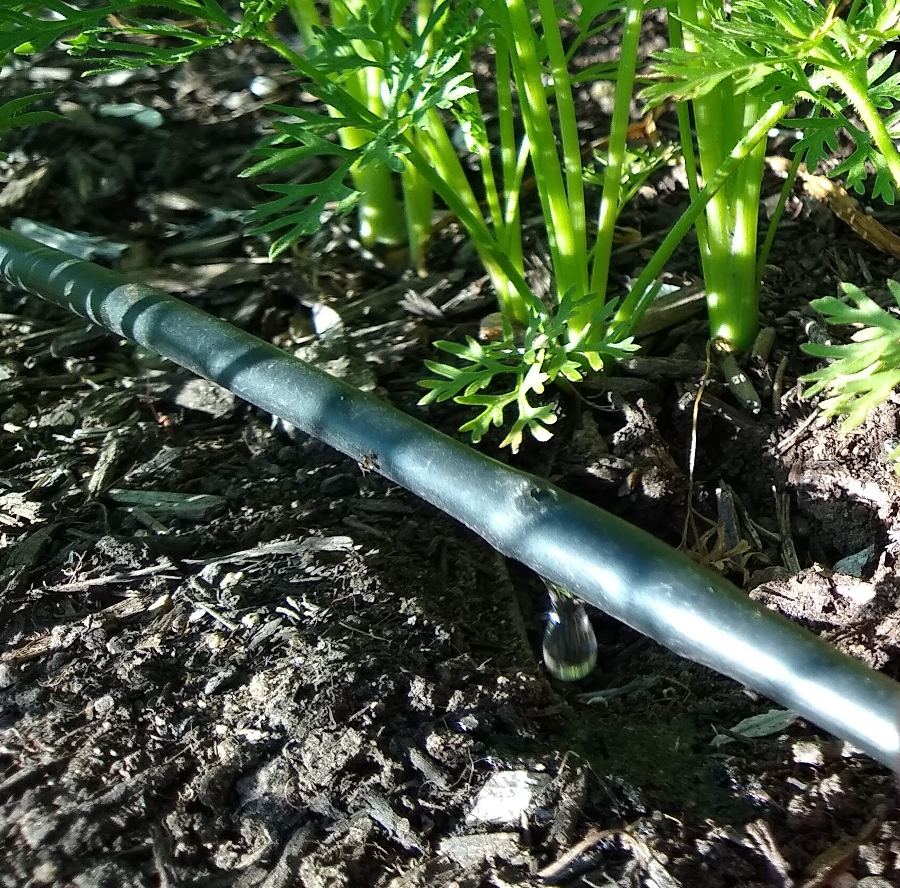
It helps to understand what happens to the drips of water that come out of each emitter. They touch the dirt and then spread laterally. Many times I have measured the lateral spread of drip irrigation in my soil, and here is what it looks like:
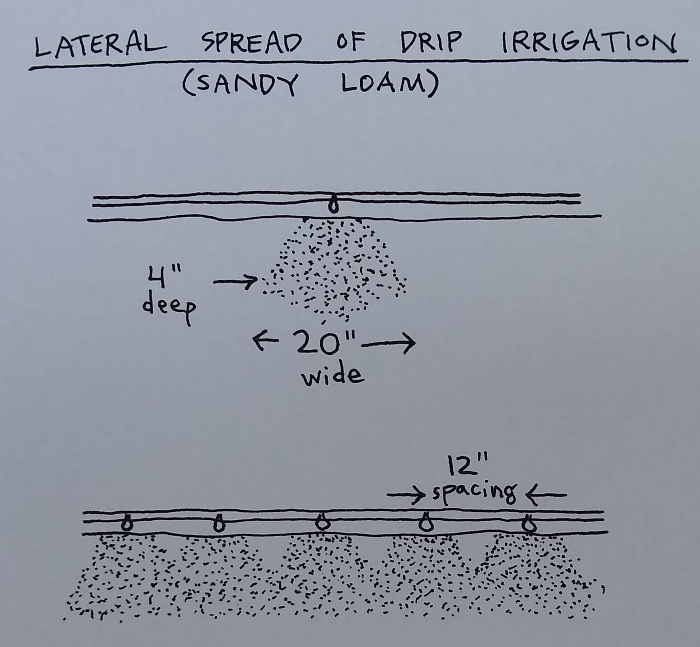
So while from the surface it may look like dots of water, just below the surface a much larger volume of dirt is being wetted.
How many emitters
Remember this: your fruit tree needs a certain quantity of water more than a certain area wetted. In other words, what is most important is that you give a tree X gallons of water; what is less important is at how many points you are applying that water.
I once heard a farm advisor say that he had determined that roughly 60 percent of the soil volume under a tree’s canopy needed to be wetted in order for the tree to produce maximum fruit. I don’t know where he got that estimate, but I keep it in the back of my mind and it seems about accurate based on trees I’ve seen in various locations and other research I’ve read.
For example, a study in Israel on avocados found that “enlargement of the wetted soil volume from 25% to 75% increased root growth rate and improved tree water status and transpiration response to high evaporative demands.”
What this means for the number of emitters we use under our trees is that there’s a range of acceptability. There’s no single correct answer. But here’s a simple rule of thumb that will put you within that 60-percent plus range: use at least as many emitters as the tree’s canopy is wide (in feet). In other words, if the tree is ten feet wide, it should have at least ten drip emitters under it.
Following this rule of thumb has brought good results for the trees on drip irrigation in my yard.
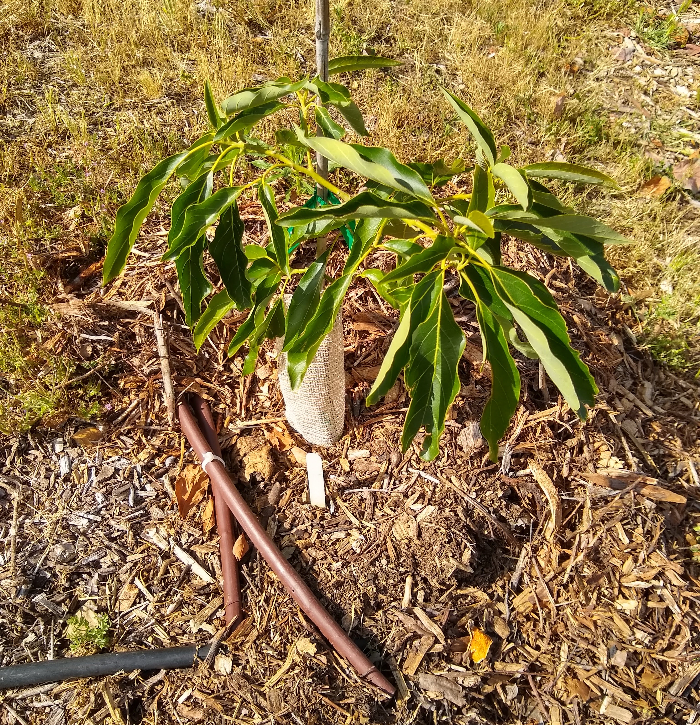
Starting newly planted trees on drip
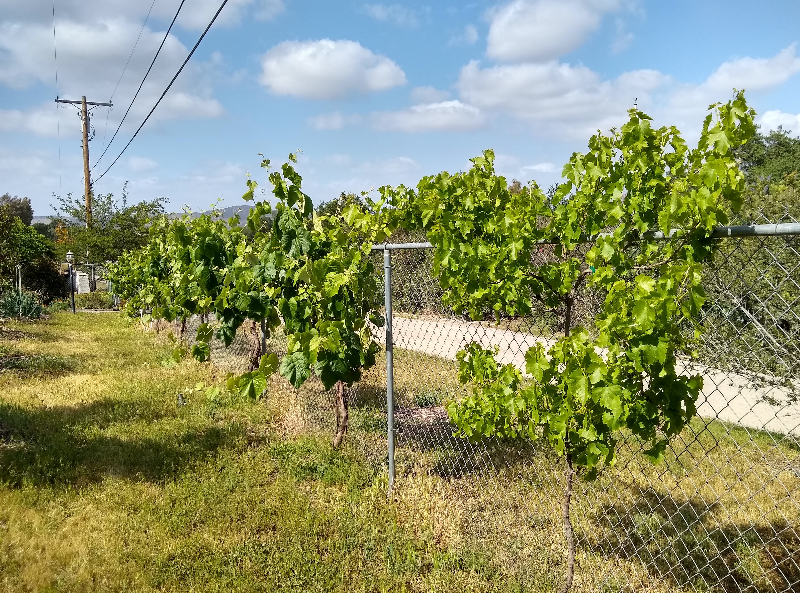
When I plant a new fruit tree, I usually give it a single drip emitter. If it’s a bigger new tree though, such as a bare-root fruit tree, I will give it two emitters. However, if any new tree is planted near established plants (e.g. a grapevine, older tree, or native bush), I give the new tree three emitters so it can better compete with the root competition of the established plants.
For the small tree, the emitter must be placed right by the trunk, which is where the tree’s roots are. For the bigger new tree, the emitters can be placed on either side of the trunk, about 6-9 inches away from the trunk.
Here is a video showing how I set up new avocado trees on drip (the method is perfectly applicable to any other kind of fruit tree):
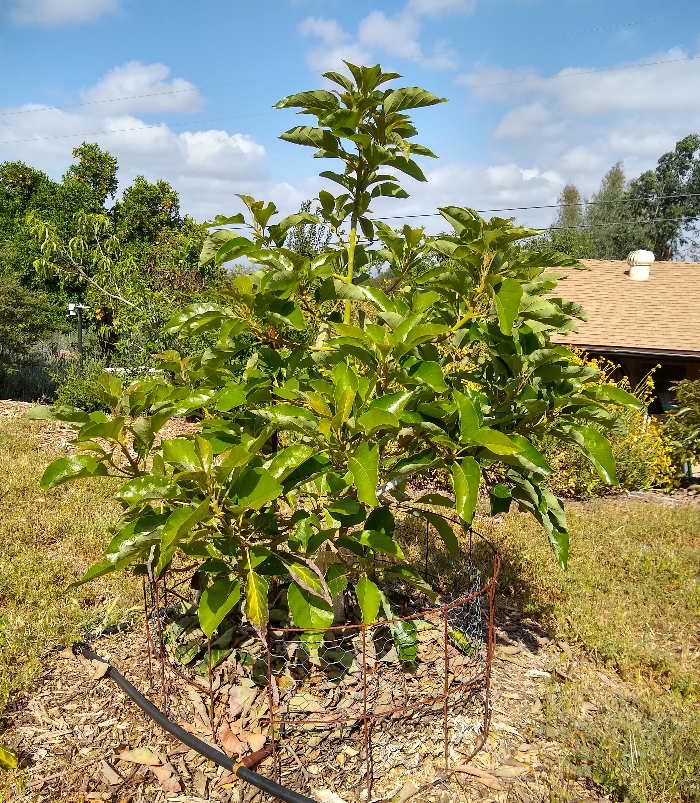
Adjusting the drip irrigation as a fruit tree grows
As a tree grows bigger it needs more water. This can be accomplished by running the system for longer, or it can be accomplished by adding emitters.
You can punch in more emitters, or if you’re using tubing with inline emitters then you can add emitters by using a connector and adding more inline tubing.
But here’s what I do for some young trees. I use inline tubing that’s longer than necessary at first – that is, it has more emitters than necessary – but I close off those extra emitters with a figure eight or other clamp. Then once the tree is bigger and needs more water, I just move the figure eight back so an additional emitter is running.
Here’s what NOT to do though. Do not change the layout of your tubing when you are adding emitters. Do not move the original emitters when you are adding new ones. If you move the original emitters, your tree is going to suffer because it has proliferated roots where the emitters have always been and now has no roots or not enough to drink the water in the new places it is being applied. If you need to change the layout of drip emitters, do so in the winter when rains are wetting the soil throughout.
Switching to drip
Similarly, do not switch from another irrigation method to drip in any season except winter, if you can help it. If you do switch in another season, it’s very important to continue giving the trees water where they had been getting it for about a month until they grow enough new roots where the new drip is applying water.
How often and how long to run drip on fruit trees
As with how many emitters to use, there is a range of effective water schedules for drip irrigation on fruit trees. For me, being twenty miles from the ocean and on a sandy loam soil, I’ve found these frequencies effective for summer (other seasons are less frequent): avocados every 2-3 days; citrus every 3-4 days; deciduous every 4-7 days.
But I’ve tried running my drip irrigation on various fruit trees as often as daily and as infrequently as every two weeks in summer.
As for how long to run the system, you have to do some simple math. If a tree has five emitters that each put out one gallon per hour, then you know you’re giving the tree five gallons every hour you run the system. Then you ask how much your tree needs.
Refer to this post to estimate: “How much to water a fruit tree in Southern California, roughly.”
Drip on slopes
There are two types of drip emitters. There are the cheap kind, and there are the expensive kind which are called “pressure compensating.” These PC emitters are the best choice for you if your yard is sloped because they will emit a more consistent flow despite the pressure changes caused by the elevation differences between your trees.
If you don’t use PC emitters on a slope, you’ll find that the trees high on the hill get less water while the system is running and the trees low on the hill continue getting some water after the system has turned off (because the water is bleeding out of the tubes through these low-elevation emitters).
Compensate for this by adding extra emitters on trees higher on the hill or by using pressure-compensating emitters. I use Netafim Techline CV tubing, which has PC emitters and check valves within the emitters so they don’t bleed out after the system has turned off. It is expensive but it is high quality. I’ve been using it for over five years and never had a single emitter clog.
But for some of my trees on a slope, where I don’t use the expensive PC emitters with check valves, I just use relatively fewer emitters on low-elevation trees.
You can buy cheap drip tubing and emitters at most nurseries and home improvement stores, but the expensive, high performance products like Netafim Techline CV are found at specialty shops like Grangetto’s in San Diego County and SiteOne Landscape Supply throughout Southern California.
An inspector with the California Department of Food and Agriculture was visiting my yard a couple weeks ago and said, “I love what you’ve got going here, but your water bill must be so high!”
He was wrong. I’ve yet to find anyone around here who gets more food production from less water.
I’m not a perfect irrigator, that’s for sure. But I prize water, and I’m frugal. And drip irrigation allows a person like me to get the most bang for my water buck.
Related posts:
Setting up a drip irrigation system: “The easiest automatic irrigation”
“Drip and micro-sprinkler irrigation troubleshooting guide”
“Setting up micro-sprinklers under fruit trees”
“Drip irrigation on newly planted avocado trees”
All of my Yard Posts are listed HERE
Thanks to all Supporters for the ability to write this post and keep The Yard Posts ad-free. Learn how you can become a Supporter here.


How did you decide which of your trees would be on drip vs which would be on micro sprinklers? Thanks!
That’s an excellent question whose answer I only alluded to in the post. In short, I default to drip, but some trees I keep on micro-sprinklers because my chickens scratch under them often and would move the driplines around. Also, some mature avocados I have on micro-sprinklers because they’re happy and productive and . . . if it ain’t broke don’t fix it.
I have a flowering plum tree in a hot front yard getting afternoon hot sun. It’s newly planted a month ago and I’m trying the 2 gallons per week method. What I don’t know is do I need to space out those 2 gallons during the week or spits out the 2 gallons over the week? I saw your previous post with deciduous fruit trees, that you only water them every 10 to 14 days. What does this mean for watering my flowering plum tree on frequency?
I’ve also had the problem of it dropping its leaves this last week. I planted it with garden soil and clay mixed in, which is what I have everywhere. The owner of the nursery told me not to give it any fertilizer until fall although I’ve heard of using starter fertilizer when planting a flowering plum. Any thoughts?
So I’m a little confused! It seems like there’s three options I’m trying to decide between for my fruit trees. One is to run one or two trip emitters for each tree, the second is to run a.1/4″ drip tubing circle around the tree canopy, third is to run a circle with a 1/2″ drip tubing ring (which might be less prone to clogging than the quarter inch). How do I decide which of the three to use? It doesn’t seem like just two emitters on either side of the tree will get the 60% coverage you talk about. Please clarify so I feel comfortable with the design I go with. Thank you!
Excellent post. Thanks for the help. Glad I found it. Was looking at whether to do inline with emitters at the drip line or else circle the drip tube around the tree at the drip line. My local BJ Plumbing owner recommended both to me and preferred the inline with two emitters per tree. The fewer emitters you put in the ground would seem the deeper the roots have to go to get water. Just water longer. Now, when my trees grow, I know not to pull the emitters, but add more.
Thanks for this info on irrigation best practices. I’m curious what your thoughts are about current restrictions going into place regarding the timing and frequency of outdoor watering: https://www.npr.org/2022/04/27/1095168884/drought-triggers-water-restrictions-for-6-million-southern-california-residents
You’re not yet affected (I don’t think?) but if you are, how will you adjust or compensate? I’m in Santa Barbara county, so not yet affected by a government mandate, but I’m paying close attention to ensure I’m informed and acting accordingly.
Hi Christine,
I tend not to pay attention to these pronouncements, and I hadn’t heard about this one. For starters, in the past they’ve made exceptions for use of drip irrigation and watering food plants.
However, my first thought whenever I see these types of news stories is about all of the water used by municipalities and universities and state agencies. It’s incredible how much they use, and on which plants they use it. They’re watering ornamental plants in the medians on highways, for example. And I used to work at UC San Diego where I’d watch them water native plants like Coast Live Oaks so much that they killed them.
And they’re going to ask us not to use water to grow our food?
Cheers, Greg. I am sympathetic to your response and agree. I know many cities use recycled water for landscaping, which I think is a smart use. I wish recycled water was more available. I’ve taken to collecting my laundry machine water to use for my plants, for example. Your post about converting a bucket to localized drip watering helps me use that, along with my good ol’ watering bucket.
I also wish more homeowners would convert lawns to edible gardens. Wishing won’t get us anywhere, however. Thanks, as always, for fantastic posts!
Wow I never thought about using laundry machine water!!! Do you collect all the water— just the rinse cycle? So curious!
Thanks for this information on watering Avocados! So user friendly and well explained!
where can i buy a GEM tree
Hi Edward,
See: https://gregalder.com/yardposts/where-to-buy-an-avocado-tree/
Thank you for the irrigation articles. Just planted an orchard and have been looking to move to drip irrigation. This and the micro sprinkler articles are timely. What size tubing are you using for the main line and then as the pig tails to the trees?
Hi James,
I use half-inch tubing for the main lines, and then I use both half-inch and quarter-inch lines for pig tails on trees.
I use Dave Wilson intensive planting (3 or 4 trees in a spot), and have 30+ fruit trees in Pasadena. I have laundry-to-landscape graywater on half. I know avocados are sensitive (leaves turning brown even before graywater), and want the minimum sodium. It’s hard to get accurate info. Any recommendations? Thanks for a great website!
Hi Mark,
I’ve grown young avocados on laundry water acceptably but only for about two years at a time.
The truth is that laundry water is variable; its quality mostly depends on the detergent you use and how much of it you use. But yes, avocados are sensitive to sodium and other salts in water/soil, more sensitive than any other fruit trees that I have experience with.
Some years back they tried to grow avocados on poor quality, reclaimed water in Escondido but it didn’t work out well.
I still encourage you to try it though. Just use little detergent (I sometimes add no detergent to my loads if they don’t seem to need it). And use the best quality detergent. I use Ecos detergent, and my laundry water has gone to a pistache tree for about the past eight years straight, and that tree has done well on this regimen.
Thanks, Greg. I just switched to Oasis detergent; I’ll try Ecos next. The trees get city water (drip) on alternating weeks. All the other fruit on the graywater are doing fine–stone fruit, pear, apple, persimmon.
Please update me on how the avocados are doing this summer. Hope they do well.
That original avocado is doing great on ECOS detergent. I’ve planted 3 more and they seem ok.
Hello Greg,
Thank you for all of your informative articles and detailed YouTube videos. I’ve learned so much through your expertise and generosity. What are your thoughts on transplanting citrus. I have a fairly small 15 gal Tango Tangerine tree that has been planted in the ground for past few years. It hasn’t done much in terms of growth and/or fruit production. I think part of the reason is because I made the mistake of planting the tree in the Kelloggs Gromulch. I’m thinking the compost has been the problem. I fertilize and water regularly and foliar spray with Captain Jacks to keep the tree pests away. If you would advise on transplanting and could recommend the best way to do it, as well as the type of soil to use I would really appreciate it. I live in the Temecula area really close to Pechanga Casino.
Thank you in advance for your help!
David
I been wondering how to protect avocado trees from triple digit heat. I have overhead sprinkler to cool the trees but it’s drenching the surrounding. I’ve heard of the Netafim pulsar used in some orchards. Any ideas, we as homeowners can use this to protect our trees. Where is this available?
Hi Leonides,
Check out these posts:
https://gregalder.com/yardposts/protecting-avocado-trees-from-heat/
https://gregalder.com/yardposts/overhead-watering-for-evaporative-cooling-on-avocado-trees/
Hi Greg! Great post, as always! We bought a new house and I have about 20 different trees ready to be planted (avocados, citrus, deciduous, mangos,…) . You made me think with your comment about irrigation frequencies of Avocados, Citrus and deciduous trees… Should I install 3 different lines with 3 different timers each? Thank you so much, Greg! Best, Alex
Thanks, Alex. Congrats on the new house. Having three different lines and timers would be ideal but not necessary. I sometimes have a mix of the types of trees on one line and that is workable.
If you mix the trees, you’ll want to at least add shut-off valves for the deciduous trees because they need no water through winter whereas sometimes the evergreens do.
Thank you so much, Greg! I will start planning to get shut-off valves. Have a great week!
Hi Greg,
After reading your article about using emitters under fruit trees I’m thinking of switching some of my 8 avocado trees from micro-spray to emitter. I’m wondering if you recommend putting the emitters under the mulch (I’ve got wood chips and leaf litter around 5 inches thick) rather than on top. That would make it a bit harder to inspect for clogged emitters, but I’m wondering if I’d lose less water to evaporation.
Thanks. Your posts are great!
Hi Bill,
I suppose you would reduce evaporation a tiny bit by burying the driplines under mulch, but my preference is still to have them on top because I catch clogged emitters and cut lines, etc. when I can see them. Also, if they’re under the mulch and you don’t move them up for a year or more, you’ll find roots growing over them, locking them in place. Then you have to rip up a bunch of roots if you want to move the dripline for any reason.
Hi Greg,
Great info. I’m in Escondido, CA. After years of neglect my wife and I started to bring our 25 mature (50 yrs old) Valencia’s back to life last fall: trim the dead stuff, food and mulch, water. We’ve been hand watering so far, and they are responding, but it’s time to put them on a system – the valves are ready to go. I’ve been going back and forth on drip vs. sprinklers and am glad to hear that drip has worked out for you with water situation as it is. Any additional thoughts beyond your great article before I jump in? Thank you!
Hi Don,
Thanks. I’d only add that since you’re in Escondido you could check out some other old Valencias on drip that do very well in the San Pasqual Valley near where the 78 starts to head up the canyon eastward toward Ramona. The grove is not fenced and just off the south side of the road near San Pasqual Academy. They use a pigtail/spiral with 0.5 inch tubing on each tree.
And if you go with mini-sprinklers, you might consider the Antelco Rotor Spray ones because they block out a nice wedge so you won’t wet your trees’ trunks. I used some other mini-sprinklers on my old Valencia for a few years that didn’t have that wedge and though I tried to keep the trunk dry in other ways it would inevitably get wet sometimes and I started getting gummosis. The gummosis totally stopped spreading and dried up once I stopped wetting the trunk.
You can buy the Antelco mini-sprinklers at Grangetto’s on Mission Ave. or online at Drip Depot.
Hey Greg,
I’m following on my last post and your response. Shortly after our last communication I saw 500’ of Netafim Techline CV on OfferUp at a good price. I bought it and did the spiral layout on our Valencia’s- like the grove you referenced in San Pasqual valley. We are very happy with results! One year later and the trees are doing well. Water usage is very low -how low it’s hard to tell because we xeriscaped another big area of our yard at the same time…and all the rain we had this winter of course. We are also adding mulch any time San Pasqual Valley Soils has their monthly giveaway. Anyway, thanks for guidance!
Great post Greg! That’s exactly what happened to me. I hid mine under the mulch for aesthetics lol and after ten years of mulching they are way deep and who knows if they work anymore. I cut them off, extended the riser, and ran new line spiral at each tree. I’m in Socal too and water one a week but I’ll try twice a week. Thanks for the info, Best info on the net!
I’m a landscaper and have buried my lines for years under mulch because I think it looks better. Haven’t had trouble with clogged emitters, but I think you do increase your risk of cutting a line accidentally with a hoe or shovel.
I wonder how you handle fertilizing with drip lines? I mean in order for the fertilizer to get into the soil you need water to wash it down from the surface. So do you just fertilize near the emitters? I’ve taken to fertilizing or mulching with compost when I know a rain is coming. Otherwise I’ll give it a good spray with the hose or use a liquid fertilizer.
Of course compost/mulch used generously over the years will provide all nutrients most trees need. But some of my clients come to me with trees that are in rough shape and need quick help.
Hi Joe,
This is an interesting topic that I’ve wrestled with a lot. It is similar to the topic of watering with drip in the first place.
I used to think, How can a big tree get its water needs met while only having wet soil in these few specific areas all summer? But once you try it or see someone else’s trees performing well on drip, you have to accept that it works, somehow.
I used to also think that if I used drip then I had to fertigate. That’s what farmers do. They inject liquid fertilizers into the irrigation line to deliver the nutrients exactly where the trees are getting their water. And it works great. I’ve seen farms all over with trees thriving on this regimen.
But I decided to just see how my trees would do if I continued with my practices of keeping a wood chip mulch under trees and adding compost occasionally. Would they still perform well?
To my surprise, they do. I don’t know for sure why, but I think it’s partly because the winter rains moisten the soil everywhere and “activate” the microbes throughout, which break down the organic matter, some of them forming relationships with the tree roots (mycorrhizal fungi). And then as the soil dries everywhere except where the drip is applied (in late spring/summer), the trees have already accessed much of what they need for the growing season.
That’s the story I’m currently telling myself, anyway. What I do know for sure is that generous compost and mulch applied over the years is sufficient for trees on drip.
As for a quick fix — outside of chemical fertilizers — I would use a liquid fertilizer like you mentioned or apply compost or other organic fertilizers where the drip emitters are applying water. As long as the weather is warm, those materials should break down and be able to be used by the tree pretty fast (I’ve heard soil scientists say within a month).
The discussion about fertilizers and drip is really helpful. I do some basic fertilizer during winter rains but wanted to do more. I add fertilizer spikes into the mulch pits where I use graywater. Now I’m going to try fertilizer spikes laid horizontally about 2-3″ under the mulch, under the drip–since your sketches who that the drip does go broad about 3″ under the tube.
Hello Greg,
Thank you for all of your informative articles and detailed YouTube videos. I’ve learned so much through your expertise and generosity. What are your thoughts on transplanting citrus. I have a fairly small 15 gal Tango Tangerine tree that has been planted in the ground for past few years. It hasn’t done much in terms of growth and/or fruit production. I think part of the reason is because I made the mistake of planting the tree in the Kelloggs Gromulch. I’m thinking the compost has been the problem. I fertilize and water regularly and foliar spray with Captain Jacks to keep the tree pests away. If you would advise on transplanting and could recommend the best way to do it, as well as the type of soil to use I would really appreciate it. I live in the Temecula area really close to Pechanga Casino.
Thank you in advance for your help!
Hi David,
You can probably transplant that tree successfully. I would do it in the winter.
Do you know anything about the dirt in your yard, such as how deep it is until a hard layer (clay or rock) and how well it drains? If it’s at least two feet deep and drains moderately well, then I would plant the tree into the native dirt with zero amendments. If it’s shallow or drains slowly, then I would plant it on a slight mound but still add zero amendments to the planting hole.
Hello Greg,
I have learned very interesting facts about drip irrigation from your article. And from all of your answers to various comments. I think is amazing and I appreciate it. I am on a very tight budge right now. I have citrus trees, about 25 years old. I have always water them by hand and a neighbor installed a very simple irrigation system. With just the end of each tube dripping. I don”t know how long I should let the water run. and My 30 year green apple tree, has not been getting any water. I fell extremely concerned because now I star seeing some leaves turning yellow. I am going to star watering the apple tree with a dripping hose. I would to transplant other ornamental plants around the fruit trees, like succulents, and this way I could water every fruit tree and plants. I am very concerned. I will appreciate your input about the best way to water. I do not want to lose my trees. They have been very good trees. We are suppose to only water once a week. I have been trying to fallow this regulation in our city. I have a couple of barrels with collected rain water. I have watering ornamentals plants with the rain water, with a watering can. I was thinking about purchasing longer watering hoses and connect them to a manual timer and just place the hose around the trees. Would it be ok to start watering the apple tree? Or would it make it more stressful to the tree. I believe its roots have always look for water. If you do not answer to my questions, I will understand. It probably sounds confusing. I will continue reading your articles. Thank you CE
Hi Carmen,
Do not hesitate to give your fruit trees as much water as they need. This is your food.
The most important thing to know is where their roots are. You must apply the water where the roots are or else it is wasted. If you had been watering the trees in a particular spot in previous years, then the roots are probably there now. Dig a little if necessary to look for roots.
Also rest assured that trees as old as yours will not die if they get somewhat less water than they would like. In fact, you could probably give them zero water this year and they would suffer but would probably not die.
How many GPH are you using on fruit trees?
Hi Aaron,
I use 0.5 gallon-per-hour emitters on some trees and 1 GPH emitters on others.
Hi Greg – I am so glad I found this site! I am in Poway and found your site because I am revisiting my past irrigation decisions for both my fruit and ornamental plantings and looking for better ideas.
How long do you find that your 1/4″ dripline pigtails last?
Less than 2 years ago I put in pigtails in my ornamental plantings (DIG 1/4″ dripline, 0.5 gph, 6″ spacing, buried under wood mulch. I am using filters and 30psi pressure regulators). This season I noticed several plants suffering and I uncovered the dripline to find that most of the emitters were clogged.
I see above that you suggest putting driplines on top of the mulch. My experience with other plants suggest that will help, although many of my ornamentals produce their own “mulch” naturally which will bury the lines anyway, and when I have the driplines on top of the wood mulch I keep catching on and yanking the pigtail away when I am cleaning out under the bushes.
Would a better quality dripline help (I see you call out Netafim)? Or is that just the lifetime I should expect from this approach?
I use adjustable bubblers under my fruit trees right now, which works OK but they mysteriously stop flowing from time to time and I need to close and open the adjustment to get them going again – but at least I can easily walk around to see if my bubblers have stopped flowing and give them a twist or two. The pigtail approach would be preferable to me if I could be more confident in it.
Hi Lee,
The 1/4″ driplines clog much more than the 1/2″. I get lots of clogging on my 1/4″ lines too. I have not had a single clog on my Netafim Techline 1/2″ driplines in over five years, however. It seems they, or something with similar quality (and higher price), would be your best option.
Hi Greg, I think I read or heard you say you prefer micro-sprinklers over drip irrigation for avocado trees. This may be a dumb question but, don’t you have to water a lot for the water to penetrate the mulch (wood chips)? I haven’t installed my irrigation system yet so I’ve been watering my 10 avocado trees by hand and typically push the mulch aside, water directly onto the roots, then put the mulch back.
I also was wondering your thoughts on another matter. Recently, I was watching a video with Gary from Laguna Nursery and he mentioned one of the orchards testing light watering avocado trees everyday vs deep watering 2-3 times per week and in the end, the trees that were light watered everyday had larger roots and used less water. Thank you.
Hi Byron,
There are pros and cons to both micro-sprinklers and drip irrigation for avocados. I have some of my trees on micro-sprinklers and some on drip. I should probably write a post getting into the details of these pros and cons.
But as for wetting the mulch, yes, you do have to soak it in order for the water to get below it and to the roots. However, this is really only relevant the first time you water a new layer of mulch. From then on, the mulch remains partly moist between irrigations and it doesn’t take extra water to get your irrigation water below it. Also, avocado roots will grow up into the moist mulch (wood chips) and extract water from there so it’s not as though water that doesn’t get into the dirt below is wasted.
I’m not aware of any study in California that shows daily watering giving improved results over watering two or three times per week (or even once per week). I am aware of a study showing the opposite.
The study is commonly referred to as the Covey Lane trial. It concluded, “Trees irrigated seven times per week had lower yields than trees that received less frequent irrigation.” See: https://journals.ashs.org/jashs/view/journals/jashs/132/2/article-p253.xml
The trees in that Covey Lane trial were on micro-sprinklers. With drip, more frequent irrigation is usually used although I’ve seen no studies comparing frequencies of drip on avocados in California.
Thank you for the Covey Lane Trial. Just in case you are interested, here is the link to Gary from Laverne Nursery YouTube video. If you fast forward to 34:50 he talks about the orchards watering daily but does not provide specifics. Thank you again!
https://www.youtube.com/watch?v=U136dargvJA
Hi Greg: I read your article and found it to be very useful. I am very new for gardening, and don’t know about drip system. I have a large backyard and have planted a few hundred various plants and about fifty fruit trees. I want to switch to drip from sprinklers that I have currently. Are there companies or individuals who can provide drip irrigation system installation service. I am not much of a handyman inside or outside of the house. What is your advice.
Thank you Greg
Thank you Greg
Thanks for an excellent article about drip irrigation system and tips about its selection. As I mentioned in previous comment, I have planted multiple variety of flower, ornamental, and decorative plants ( over 300) and about 50 fruit trees which now have grown. I am currently using sprinkler system and intend to change to drip irrigation. I intend to switch but am not very hands on guy to install a drip system.
Are there any small companies or consultants who can do this installation job. If such services are available and if you have any information I would very much appreciate receiving it from you are any of your web users who have access to this comment.
Thank you again.
I have had drip for over 20 years so I know the advantages, but never on our fruit trees. Your article is great but I have a question. All my valves have pressure reducers down to 30 psi, but I don’t see any in your discerptions. Is the pressure reduced out of the timer? I don’t think so.
Thanks
A wonderful web-site
Hi Jack,
Thank you. I have pressure reducers (to 25 PSI) on some of my valves but not all. I find them unnecessary if the valve is only partially open and there’s not a risk of someone fully opening it accidentally (which would blow out some emitters).
I just found you and I’m in the process of setting up drip irrigation to about twenty fruit trees, new and established. This will be gravity fed from large water tank installed up the hill. Is there anything I need to do differently? I’ll have a 1 1/2” coming down the hill and 1/2” T connections leading to the trees. I won’t know the pressure until I have the tank set up.
Hi Bo,
The main thing you need to do differently with gravity fed drip is use emitters that are not pressure compensating unless your tank is way up the hill and you have at least 20 PSI.
I am laying out a grey water system for fruit trees and berries. I will have 2 trees in each hole with one greywater outlet. If each of the outlets gets 2 gallons every other day, that’s 6 gallons per 2 trees per week. All trees will be 1-2 year old dwarf apples, pears, peaches and apricots. Will this be adequate? I live in the high desert of Central Oregon. Short season but July and August can be 90-100 degrees in the day and 40-50-60 degrees night time.
Hi John,
I think that will be enough for this first summer, or at least very close to enough.
Best information on drip watering I have read and I have read a lot. Thanks for all the info.
Thanks so much for all of your posts, they’re incredibly helpful. Do you have any preference between placing drip emitters on top of mulch as opposed to burying it beneath the mulch but on top of the soil? My inclination is that either is fine, but since the roots tend to grow within the mulch I was wondering if placing emitters on top would be preferable.
Super curious about your opinion. I recently removed all the bushes in my backyard and am now replacing them with fruit trees. The old sprinkler system still exists, i plan on taking them out to replace it with drip lines, is there anything i should be weary of with timed sprinkler systems running into drip lines? I’ll probably have to adjust the system’s run time once i get everything planted.